Strawberry Cream Danish – Easy Sweet Pastry Recipe
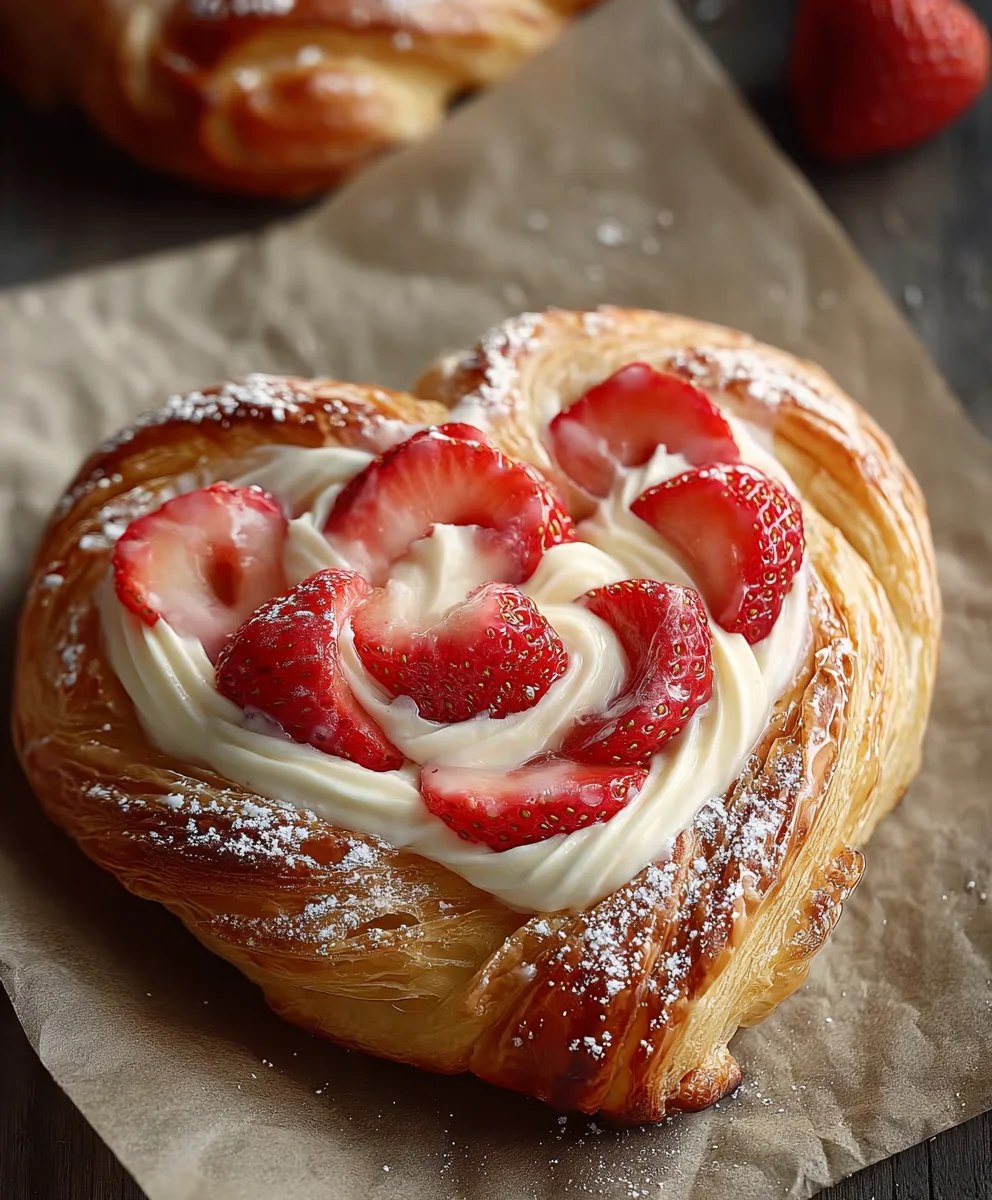
Strawberry Cream Danish are a delightful indulgence that instantly transports you to a world of flaky pastry, sweet berries, and luscious cream. What is it about this particular pastry that captures our hearts and taste buds? Perhaps it’s the perfect marriage of textures: the crisp, buttery layers of the Danish dough yielding to a soft, pillowy cream cheese filling, all crowned with jewel-like fresh strawberries. It’s a symphony of flavors that feels both sophisticated and comforting, making it an ideal treat for a special brunch, a delightful afternoon pick-me-up, or even a decadent dessert. The sheer visual appeal of a perfectly executed Strawberry Cream Danish, with its glistening berries and golden pastry, is enough to make anyone swoon. We adore this pastry for its ability to elevate everyday moments into something truly memorable.
Why You’ll Love This Recipe
This isn’t just any Strawberry Cream Danish; it’s a recipe designed to bring that bakery-quality perfection right into your own kitchen. We’ve cracked the code to achieving those impossibly light and airy pastry layers, and paired it with a creamy filling that’s the ideal balance of sweet and tangy. Plus, using fresh, ripe strawberries is key to unlocking the full vibrant flavor. Imagin extracte the satisfaction of biting into your own homemade creation – it’s an experience that truly sets this Strawberry Cream Danish apart.

Ingredients:
- 1/4 cup warm water (around 105-115°F or 40-46°C)
- 2 1/4 teaspoons active dry yeast (this is typically one standard packet)
- 1/2 cup milk, at room temperature
- 1 large egg, at room temperature
- 1/4 cup granulated sugar
- 1 teaspoon salt
- 2 1/2 cups all-purpose flour, plus additional for dusting your work surface and hands
- 1 cup (2 sticks) unsalted butter, very cold and cut into 1/2-inch cubes
- 8 ounces cream cheese, softened to room temperature
- 1/4 cup granulated sugar
- 1/2 teaspoon vanilla extract
- Fresh strawberries, washed, hulled, and sliced for topping
- 1 cup powdered sugar
- 2 tablespoons milk or water (for the glaze)
- 1/2 teaspoon vanilla extract (for the glaze)
Preparing the Dough for Your Strawberry Cream Danish
This recipe starts with a rich, laminated dough, which is what gives Danish pastries their signature flaky layers. We’ll begin extract by activating the yeast. In a small bowl, combine the 1/4 cup warm water and the active dry yeast. Give it a gentle stir and let it sit for about 5-10 minutes. You should see a foamy, bubbly layer form on top. This indicates that your yeast is alive and ready to work its magic. If it doesn’t foam, your yeast might be old or the water too hot/cold, and you’ll need to start with fresh yeast.
While the yeast is blooming, in a large mixing bowl, whisk together the 1/2 cup room temperature milk, the room temperature large egg, 1/4 cup granulated sugar, and the 1 teaspoon salt. Once the yeast is foamy, pour it into the milk mixture. Gradually add the 2 1/2 cups of all-purpose flour, mixing until a shaggy dough forms. Turn the dough out onto a lightly floured surface. Knead the dough for about 5-7 minutes until it’s smooth and elastic. You want to develop the gluten, which will give the dough structure. Place the dough in a lightly greased bowl, cover it with plastic wrap or a damp kitchen towel, and let it rise in a warm place for about 1 hour, or until it has doubled in size.
Creating the Butter Block and Laminating the Dough
This is where the magic of lamination happens. Once your dough has risen, punch it down to release the air. On a lightly floured surface, gently roll out the dough into a rectangle, roughly 10×15 inches. Now, it’s time for the butter. Take your cold, cubed unsalted butter and place it on a piece of parchment paper. Cover it with another piece of parchment paper and gently pound it with a rolling pin or the flat side of a meat mallet until it forms a rough rectangle, about 6×8 inches. You want the butter to be pliable but still cold.
Place the butter rectangle in the center of your rolled-out dough. Fold the edges of the dough over the butter, sealing it completely. This is like wrapping a present. You want to ensure no butter can escape. Once senon-alcoholic aled, you’ll start the “turns.” Roll the dough out into a long rectangle again, about 8×16 inches. Fold the dough into thirds, like a letter. This is your first “turn.” Cover the dough and refrigerate for at least 30 minutes. This chilling period is crucial to keep the butter firm and prevent it from melting into the dough, which is essential for creating distinct flaky layers.
Repeat this process two more times. After each turn, ensure the dough is well-chilled for at least 30 minutes before proceeding to the next rolling and folding. So, you’ll roll, fold into thirds, chill, roll, fold into thirds, chill, and finally, roll, fold into thirds one last time. After the final turn, let the dough chill for at least 1 hour, or even overnight, before shaping.
Crafting the Cream Cheese Filling and Shaping the Danishes
While the dough is chilling, prepare your luscious cream cheese filling. In a medium bowl, beat the softened 8 ounces of cream cheese until it’s smooth and creamy. You can use a hand mixer or a whisk for this. Add the 1/4 cup granulated sugar and the 1/2 teaspoon vanilla extract to the cream cheese. Beat until well combined and no lumps of cream cheese remain. Set this aside.
Now, it’s time to shape our danishes. Take your chilled dough and roll it out on a lightly floured surface into a large rectangle, about 10×18 inches. Trim the edges to make them neat. Cut this rectangle in half lengthwise, creating two long strips. Then, cut each strip crosswise into six equal pieces, so you have twelve smaller rectangles.
On each small rectangle, carefully spread a tablespoon or two of the cream cheese filling, leaving a border of about 1/2 inch around the edges. You don’t want to overfill them, or the filling will ooze out too much during baking. For each danish, take two opposite corners of the dough rectangle and bring them to the center, overlapping them slightly over the cream cheese filling. Gently press them together to seal. This creates the classic Danish shape, allowing the filling to peek through. Place the shaped danishes on a baking sheet lined with parchment paper, leaving about 2 inches between each one as they will expand.
Baking and Glazing Your Strawberry Cream Danish
Preheat your oven to 375°F (190°C). Brush the tops of your shaped danishes lightly with a little milk or an egg wash (if you have an extra egg yolk). This helps them get a beautiful golden-brown color during baking. Place the baking sheet in the preheated oven and bake for 15-20 minutes, or until the danishes are puffed up and golden brown. Keep an eye on them, as ovens can vary.
While the danishes are baking, prepare the simple glaze. In a small bowl, whisk together the 1 cup powdered sugar, 2 tablespoons milk or water, and 1/2 teaspoon vanilla extract until you have a smooth, pourable glaze. If it’s too thick, add a tiny bit more liquid. If it’s too thin, add a little more powdered sugar.
Once the danishes are baked and have cooled slightly on the baking sheet for a few minutes, transfer them to a wire rack to cool completely. This is important so the glaze doesn’t melt off. Once they are mostly cooled, drizzle the glaze generously over the top of each danish. Immediately arrange your fresh, sliced strawberries on top of the glaze while it’s still slightly wet, allowing them to adhere. Let the glaze set completely before serving your beautiful, homemade Strawberry Cream Danish.
Conclusion:
There you have it – your guide to creating the most delightful Strawberry Cream Danish! We’ve walked through each step, from preparing the flaky pastry to crafting the luscious cream filling and topping it off with fresh, sweet strawberries. This recipe is a wonderful way to elevate your breakfast, brunch, or even dessert. The combination of buttery puff pastry, rich cream, and vibrant strawberries is truly irresistible and sure to impress anyone who tries it.
For serving, I love to enjoy these danishes warm, perhaps with a light dusting of powdered sugar or a small drizzle of balsamic glaze for a sophisticated touch. They pair beautifully with a cup of coffee or a glass of chilled sparkling grape juice. Don’t be afraid to experiment! You can swap out the strawberries for other fresh berries like raspberries or blueberries, or even add a hint of lemon zest to the cream for an extra zing. The possibilities are endless!
I encourage you to give this Strawberry Cream Danish recipe a try. It might seem a bit involved at first, but the results are incredibly rewarding. Enjoy the process, and savor every bite of your homemade creation!
Frequently Asked Questions:
Can I make the puff pastry from scratch?
While this recipe assumes you’re using store-bought puff pastry for convenience, you absolutely can make your own puff pastry from scratch! It’s a more time-consuming process but yields an even more exceptional result. If you choose to make it yourself, ensure it’s well-chilled before proceeding with the danish assembly.
How should I store leftover Strawberry Cream Danish?
Leftover danishes are best stored in an airtight container in the refrigerator for up to 2-3 days. The cream filling will hold up well, but the pastry might lose some of its crispness over time. For the best texture, you can gently re-warm them in a low oven for a few minutes before serving.
What if I don’t have fresh strawberries?
If fresh strawberries aren’t in season or readily available, you can certainly use frozen strawberries. Thaw them completely and drain off any excess liquid before adding them to the danish. Alternatively, a good quality strawberry jam or compote can be used as a substitute for a different, but still delicious, flavor profile.
Strawberry Cream Danish – Easy Sweet Pastry Recipe
An easy recipe for flaky, layered strawberry cream danishes with a rich cream cheese filling and a sweet glaze.
Ingredients
-
1/4 cup warm water
-
2 1/4 teaspoons active dry yeast
-
1/2 cup milk, at room temperature
-
1 large egg, at room temperature
-
1/4 cup granulated sugar
-
1 teaspoon salt
-
2 1/2 cups all-purpose flour, plus additional for dusting
-
1 cup (2 sticks) unsalted butter, very cold and cut into 1/2-inch cubes
-
8 ounces cream cheese, softened to room temperature
-
1/4 cup granulated sugar
-
1/2 teaspoon vanilla extract
-
Fresh strawberries, washed, hulled, and sliced for topping
-
1 cup powdered sugar
-
2 tablespoons milk or water
-
1/2 teaspoon vanilla extract
Instructions
-
Step 1
Activate the yeast by combining warm water and yeast. Let it sit for 5-10 minutes until foamy. Whisk together milk, egg, 1/4 cup sugar, and salt in a large bowl. Pour in the activated yeast. Gradually add flour to form a shaggy dough. Knead for 5-7 minutes until smooth. Place in a greased bowl, cover, and let rise for 1 hour until doubled. -
Step 2
Punch down the dough. Roll into a 10×15 inch rectangle. Pound cold butter between parchment paper into a 6×8 inch rectangle. Place butter in the center of the dough and fold edges over to seal. Roll into an 8×16 inch rectangle and fold into thirds (first turn). Cover and refrigerate for 30 minutes. -
Step 3
Repeat the rolling, folding into thirds, and chilling process two more times. After the final turn, chill the dough for at least 1 hour, or overnight. -
Step 4
While the dough chills, prepare the cream cheese filling by beating softened cream cheese until smooth. Mix in 1/4 cup sugar and 1/2 teaspoon vanilla extract until well combined. -
Step 5
Roll out the chilled dough into a 10×18 inch rectangle. Trim edges. Cut in half lengthwise, then crosswise into twelve rectangles. Spread 1-2 tablespoons of cream cheese filling on each rectangle, leaving a border. Bring two opposite corners to the center, overlapping slightly to seal. Place on a parchment-lined baking sheet. -
Step 6
Preheat oven to 375°F (190°C). Brush danishes with milk or egg wash. Bake for 15-20 minutes until puffed and golden brown. While baking, prepare the glaze by whisking together powdered sugar, 2 tablespoons milk/water, and 1/2 teaspoon vanilla extract until smooth. -
Step 7
Cool danishes slightly on the baking sheet, then transfer to a wire rack to cool completely. Drizzle glaze over the danishes and immediately top with fresh sliced strawberries. Let the glaze set before serving.
Important Information
Nutrition Facts (Per Serving)
It is important to consider this information as approximate and not to use it as definitive health advice.
Allergy Information
Please check ingredients for potential allergens and consult a health professional if in doubt.