Easy Frozen Chocolate Yogurt Clusters Recipe
Frozen Chocolate Yogurt Clusters are the ultimate guilt-free indulgence that have taken the dessert world by storm! If you’re like me, you crave something sweet and satisfying, but often struggle to find options that align with healthier eating habits. Well, prepare to be delighted! These simple yet elegant treats offer that perfect balance of creamy, tangy yogurt and rich, decadent chocolate, all in a convenient, bite-sized package. What truly makes Frozen Chocolate Yogurt Clusters so special is their incredible versatility and the sheer joy they bring. They’re not just a dessert; they’re a little burst of happiness that’s perfect for a midday pick-me-up, a post-workout reward, or even a sophisticated addition to a dessert platter. The satisfying crunch, the melty chocolate, and the refreshing yogurt – it’s a flavor and texture combination that’s utterly addictive.
Why You’ll Love These
There’s something inherently magical about a dessert that requires minimal effort but delivers maximum flavor and satisfaction. That’s precisely the allure of Frozen Chocolate Yogurt Clusters. They tap into our desire for something sweet and comforting, without the heavy feeling often associated with traditional desserts. The inherent goodness of yogurt, combined with the irresistible allure of chocolate, creates a symphony for the taste buds that is both exciting and reassuring. Imagin extracte biting into a cool, firm cluster, the crisp chocolate shell giving way to a smooth, creamy interior. It’s an experience that’s both refreshing and deeply satisfying, making them a go-to option for those moments when you need a little treat.
What Makes Them So Irresistible?
The beauty of Frozen Chocolate Yogurt Clusters lies in their simplicity and the quality of their core ingredients. The tangy, probiotic-rich yogurt provides a delightful counterpoint to the sweet richness of the chocolate, creating a flavor profile that is both complex and harmonious. Plus, the frozen element adds an incredible texture – a delightful contrast between the firm yogurt and the melting chocolate. This textural play is key to their addictive nature. They are inherently customizable, allowing you to tailor them to your personal preferences. The pure, unadulterated joy of a simple, delicious, and relatively healthy treat is what truly elevates these Frozen Chocolate Yogurt Clusters from mere dessert to a beloved staple.
Ingredients:
- 1 1/2 cups chopped fresh strawberries
- 1 cup plain Greek yogurt
- 1 tablespoon honey
- 1 teaspoon vanilla extract
- 1 cup semi-sweet chocolate chips
- 2 tablespoons coconut oil
Preparing the Strawberry Base
Step 1: Puree the Strawberries
Begin extract by preparing your fresh strawberries. You’ll need to chop them into smaller pieces first, removing any stems. Then, transfer about 1 1/2 cups of these chopped strawberries into a blender or food processor. The goal here is to create a smooth, vibrant puree. Blend until there are no large chunks remaining and you have a liquid consistency. If your strawberries are particularly firm, you might need to add a tablespoon of water to help them blend more easily. This strawberry puree will form the flavorful, fruity core of our Frozen Chocolate Yogurt Clusters.
Step 2: Combine Yogurt and Flavorings
In a medium mixing bowl, combine 1 cup of plain Greek yogurt. This full-fat Greek yogurt provides a wonderful creamy texturegin extractd tanginess that balances the sweetness of the strawberries and chocolate. To this, add 1 tablespoon of honey. The honey will lend a natural sweetness and a lovely floral note. Next, stir in 1 teaspoon of vanilla extract. Vanilla is a fantastic enhancer for both chocolate and fruit flavors, so don’t skip this! Whisk these ingredients together thoroughly until the honey is completely dissolved and the mixture is uniform in color and consistency. You’re looking for a smooth, creamy blend, free of any streaks of honey or vanilla.
Step 3: Fold in the Strawberry Puree
Now, gently fold the strawberry puree you made in Step 1 into the yogurt mixture from Step 2. Use a spatula or a wooden spoon for this. It’s important to fold rather than stir vigorously to maintain some beautiful pink swirls in the yogurt. You don’t need to fully incorporate the strawberry puree; allowing for streaks and pockets of both colors will create a visually appealing cluster. This is where the magic starts to happen, transforming a simple yogurt mixture into something special.
Creating the Chocolate Coating
Step 4: Melt the Chocolate and Coconut Oil
In a heatproof bowl, combine 1 cup of semi-sweet chocolate chips and 2 tablespoons of coconut oil. The coconut oil is key here; it helps the chocolate melt smoothly, creates a thinner coating for easier dipping, and contributes to a crispier finish when the clusters are frozen. You can melt this mixture using a double boiler method or in the microwave. For the microwave, place the bowl in and heat in 30-second intervals, stirring well after each interval, until the chocolate is almost completely melted. Then, stir until smooth. If using a double boiler, place the bowl over a pot of simmering water, ensuring the bottom of the bowl doesn’t touch the water, and stir gently until melted and smooth. Be patient and don’t overheat the chocolate, as it can seize and become grainy.
Assembling and Freezing the Clusters
Step 5: Form and Coat the Clusters
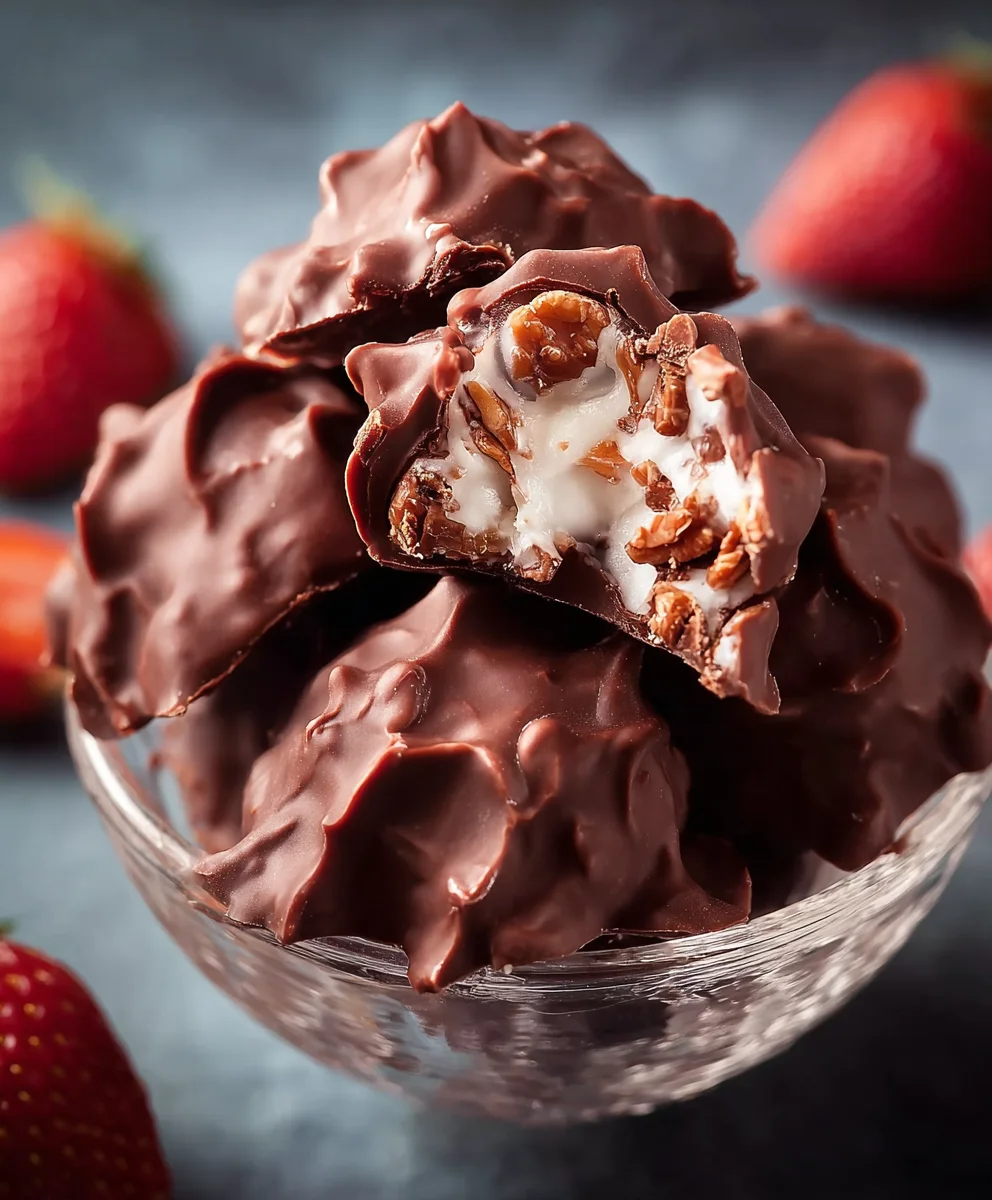
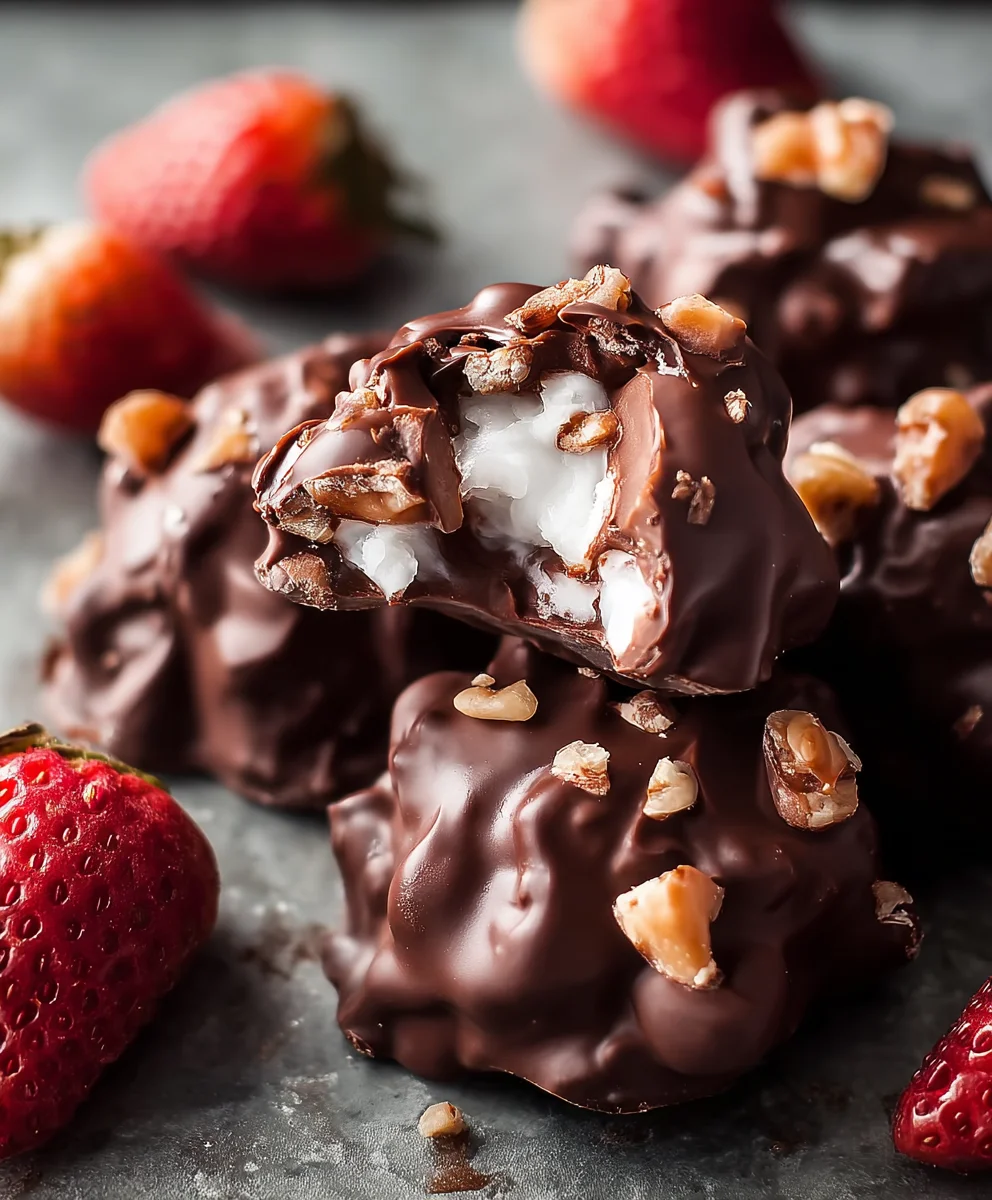
Line a baking sheet with parchment paper or wax paper. This will prevent your clusters from sticking once frozen. Now, take spoonfuls of your strawberry yogurt mixture and place them onto the prepared baking sheet. Aim for bite-sized portions, about 1 to 1.5 tablespoons each. Don’t worry about them being perfectly shaped; the rustic look is part of their charm. Once all the yogurt mixture is portioned out, it’s time for the chocolate bath. Using a spoon or a small whisk, carefully dip each yogurt portion into the melted chocolate mixture, ensuring it’s fully coated. You can also drizzle the chocolate over the tops for an extra decorative touch. Once coated, place the chocolate-dipped clusters back onto the parchment-lined baking sheet. Repeat this process until all the yogurt portions are coated.
Step 6: Freeze Until Firm
Place the baking sheet filled with your coated clusters into the freezer. Allow them to freeze for at least 2 to 3 hours, or until completely solid and firm to the touch. This freezing time is crucial for achieving that satisfying crunch of the chocolate shell against the creamy, frozen yogurt inside. Once they are firm, you can transfer them to a freezer-safe container or a resealable bag for storage. Enjoy these delightful Frozen Chocolate Yogurt Clusters as a healthy and refreshing treat!
Conclusion:
And there you have it! You’ve now mastered the art of creating delicious and satisfying Frozen Chocolate Yogurt Clusters. These delightful treats are incredibly easy to make, requiring minimal effort for maximum flavor. The perfect balance of creamy yogurt, rich chocolate, and delightful mix-ins makes them an irresistible snack or dessert for any occasion. I encourage you to give this recipe a try; I’m confident you’ll fall in love with their simplicity and fantastic taste. They are wonderfully versatile, so don’t hesitate to experiment with different additions.
For serving, these Frozen Chocolate Yogurt Clusters are best enjoyed straight from the freezer. They make a fantastic healthy dessert option, a quick afternoon pick-me-up, or even a fun addition to a kids’ lunchbox (packed in a small insulated container, of course!). Consider pairing them with fresh berries for an extra burst of flavor and color.
When it comes to variations, the possibilities are endless! Feel free to swap out the chocolate chips for dark, milk, or white chocolate. Nuts like almonds, walnuts, or pecans add a lovely crunch, while dried fruits such as cranberries or raisins provide a chewy texture and natural sweetness. A sprinkle of sea salt can really enhance the chocolate flavor. You can even add a dash of cinnamon or a hint of peppermint extract for a festive twist.
Frequently Asked Questions:
How do I store Frozen Chocolate Yogurt Clusters?
Store your Frozen Chocolate Yogurt Clusters in an airtight container in the freezer. They will stay fresh and delicious for up to a month. It’s important to ensure they are completely frozen before storing to prevent them from becoming too soft.
Can I use different types of yogurt for this recipe?
Absolutely! While Greek yogurt provides a thicker, creamier texture, you can also use regular plain yogurt, vanilla yogurt, or even a dairy-free yogurt alternative like coconut or almond yogurt. Just be aware that the consistency might vary slightly depending on the yogurt you choose.
Easy Frozen Chocolate Yogurt Clusters
A simple and delicious recipe for frozen chocolate-dipped yogurt clusters with a strawberry swirl, perfect for a healthy treat.
Ingredients
-
1 1/2 cups chopped fresh strawberries
-
1 cup plain Greek yogurt
-
1 tablespoon honey
-
1 teaspoon vanilla extract
-
1 cup semi-sweet chocolate chips
-
2 tablespoons coconut oil
Instructions
-
Step 1
Puree the chopped strawberries in a blender or food processor until smooth. Add a tablespoon of water if needed for consistency. -
Step 2
In a mixing bowl, combine Greek yogurt, honey, and vanilla extract. Whisk until smooth and uniform. -
Step 3
Gently fold the strawberry puree into the yogurt mixture, creating swirls. Avoid overmixing to maintain the visual appeal. -
Step 4
Melt semi-sweet chocolate chips and coconut oil together in a heatproof bowl using a double boiler or microwave. Stir until smooth. -
Step 5
Line a baking sheet with parchment paper. Spoon portions of the strawberry yogurt mixture onto the sheet. Dip each portion into the melted chocolate, ensuring full coverage. Return coated clusters to the baking sheet. -
Step 6
Place the baking sheet in the freezer and freeze for at least 2-3 hours, or until completely firm. Store in a freezer-safe container.
Important Information
Nutrition Facts (Per Serving)
It is important to consider this information as approximate and not to use it as definitive health advice.
Allergy Information
Please check ingredients for potential allergens and consult a health professional if in doubt.