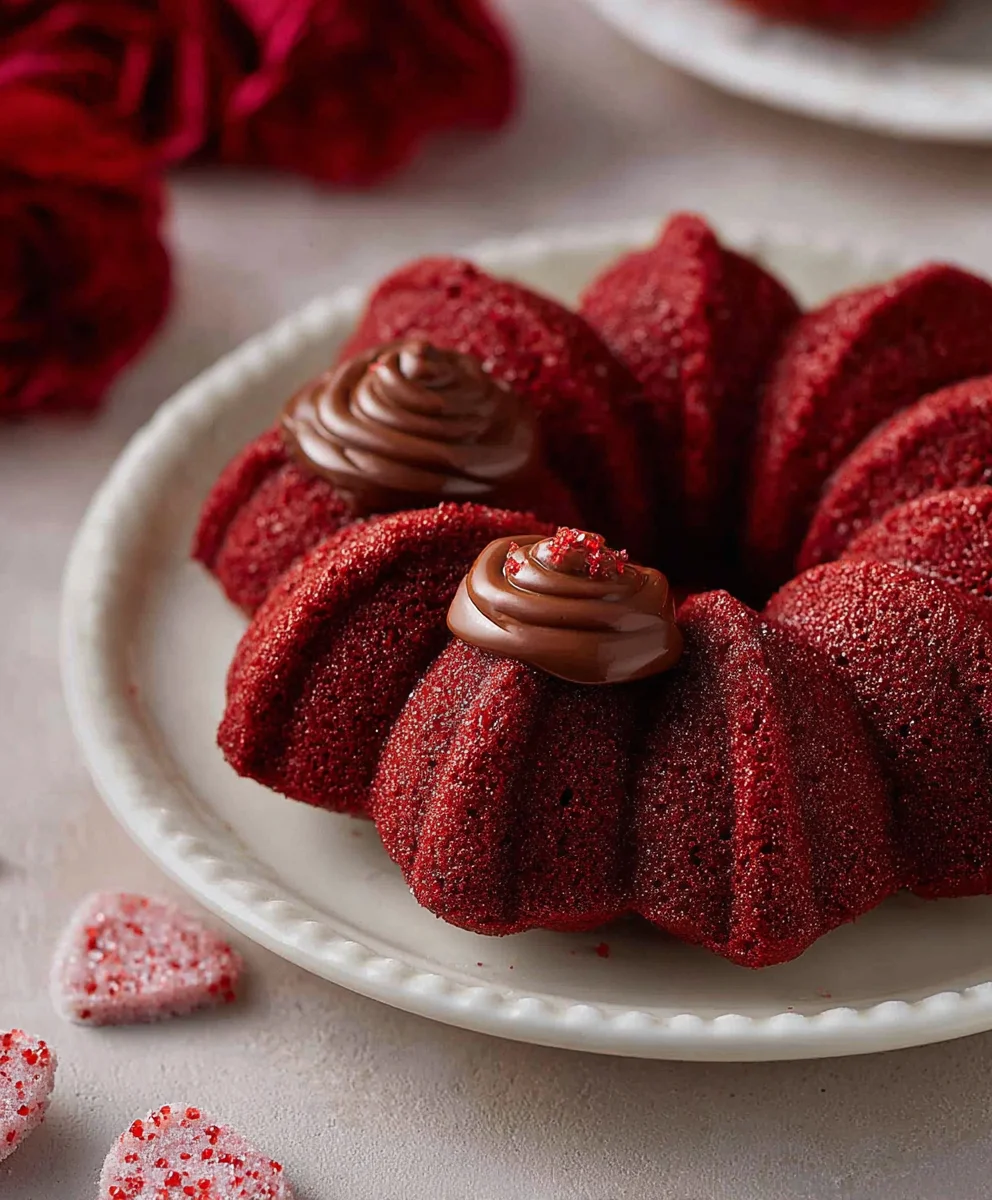
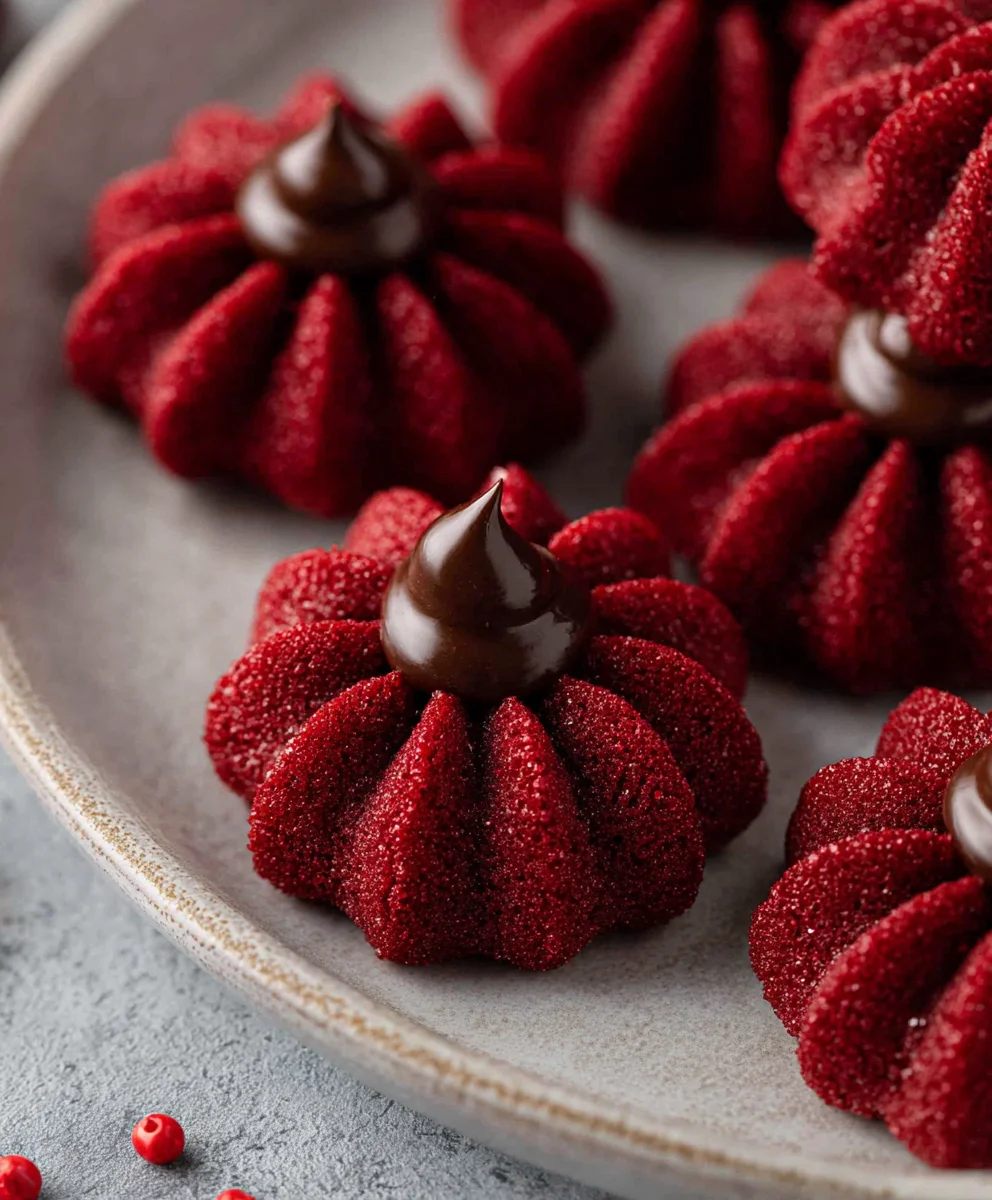
Hershey’s Red Velvet Blossoms-Easy Holiday Cookies
Hershey’s red velvet blossoms are more than just a cookie; they’re a nostalgic embrace, a vibrant splash of festivity, and a guaranteed crowd-pleaser. Imagin extracte sinking your teeth into a soft, chewy cookie with that unmistakable rich, chocolatey tang of red velvet, all crowned with a luscious, sweet kiss of Hershey’s chocolate. It’s no wonder these beauties are a perennial favorite, appearing at every holiday gathering and bake snon-alcoholic ale with joyful abandon. The magic lies in their perfect balance of textures and flavors: the tender cake-like interior of the red velvet cookie giving way to the smooth melt of the chocolate centerpiece. They’re relatively simple to whip up, making them an ideal project for bakers of all skill levels, and their striking crimson hue is as delightful to the eye as their taste is to the palate. Get ready to experience the simple, unadulterated joy of these iconic Hershey’s red velvet blossoms!
Ingredients:
- 7 tablespoons butter, softened (salted or unsalted are both fine, just adjust salt if using salted butter)
- 1/2 cup packed brown sugar
- 2 tablespoons granulated sugar
- 1 teaspoon vanilla extract
- 1 large egg yolk
- 1/4 teaspoon red food coloring gel (gel works best for intense color without adding too much liquid)
- 1 cup all-purpose flour
- 1 tablespoon unsweetened cocoa powder
- 1/2 teaspoon baking powder
- 1/4 teaspoon salt (omit if using salted butter)
- 1/4 cup red sanding sugar
- 18 Hershey’s chocolate kisses (milk chocolate or special dark are great choices)
Preparing the Dough
-
Cream the Butter and Sugars:
In a large mixing bowl, combine the softened butter, brown sugar, and granulated sugar. Using an electric mixer on medium speed, beat them together until the mixture is light and fluffy. This usually takes about 2-3 minutes. This step is crucial for incorporating air into the dough, which will result in a tender cookie. Scrape down the sides of the bowl occasionally to ensure everything is evenly mixed.
-
Incorporate Wet Ingredients and Color:
Add the vanilla extract and the single egg yolk to the creamed butter and sugar mixture. Beat again until just combined. Now, it’s time for the magic color! Add the 1/4 teaspoon of red food coloring gel. Mix on low speed until the color is evenly distributed and you have a vibrant red dough. Be careful not to overmix at this stage. The gel coloring is potent, so a little goes a long way.
-
Combine Dry Ingredients:
In a separate medium bowl, whisk together the all-purpose flour, cocoa powder, baking powder, and salt (if you’re using unsalted butter). Whisking them together before adding to the wet ingredients ensures that the leavening agent and salt are evenly dispersed throughout the flour, preventing pockets of saltiness or uneven rising in your cookies.
-
Combine Wet and Dry Mixtures:
Gradually add the dry ingredients to the wet ingredients, mixing on low speed until just combined. Be careful not to overmix the dough once the flour is added. Overmixing can develop the gluten in the flour, leading to tougher cookies. Stop mixing as soon as you no longer see streaks of dry flour. The dough will be thick and slightly sticky.
Shaping and Baking the Blossoms
-
Chill and Roll the Dough:
Cover the bowl of dough with plastic wrap and refrigerate for at least 30 minutes. Chilling the dough makes it easier to handle and prevents the cookies from spreading too much during baking. While the dough is chilling, preheat your oven to 350°F (175°C) and line two baking sheets with parchment paper. Once chilled, scoop out portions of dough (about 1 tablespoon each) and roll them into small balls.
-
Coat with Sanding Sugar:
Pour the red sanding sugar into a shallow bowl. Gently roll each dough ball in the red sanding sugar, ensuring they are well coated on all sides. The sanding sugar will give these Hershey’s red velvet blossoms their signature sparkle and festive appearance. Place the coated dough balls about 2 inches apart on the prepared baking sheets.
-
Bake and Add the Kisses:
Bake for 8-10 minutes, or until the edges of the cookies are set but the centers still look slightly soft. They will continue to set as they cool. Immediately after removing the baking sheets from the oven, gently press one Hershey’s chocolate kiss into the center of each warm cookie. The residual heat from the cookie will help the chocolate soften and create that classic blossom effect. If the cookies seem too firm to press the kisses in, you can pop them back in the oven for another minute or two, but watch them closely to avoid burning.
-
Cool and Enjoy:
Let the cookies cool on the baking sheets for about 5 minutes before carefully transferring them to a wire rack to cool completely. As they cool, the chocolate kiss will firm up slightly, creating the perfect centerpiece for your Hershey’s red velvet blossoms. Enjoy these delightful, festive treats!
Conclusion:
And there you have it – the delightfully simple yet incredibly satisfying recipe for Hershey’s red velvet blossoms! We’ve journeyed through the steps to create these charming, chewy, and perfectly spiced cookies, guaranteed to be a hit with everyone. The vibrant red hue is not only visually appealing but also hints at the rich, classic red velvet flavor that lies within. These cookies are fantastic on their own, but they truly shine when served with a cold glass of milk or a warm cup of coffee. For an extra touch of elegance, consider dusting them with a little powdered sugar after they’ve cooled completely.
Don’t be afraid to experiment! You can easily adapt this Hershey’s red velvet blossoms recipe. Try adding a sprinkle of white chocolate chips for a delightful contrast, or perhaps a hint of almond extract to the dough for a nutty undertone. You could even experiment with different frosting colors if you’re feeling particularly festive. The joy of baking is in making it your own, and these Hershey’s red velvet blossoms offer a wonderful canvas for your creativity. So go forth, bake with confidence, and enjoy every delicious bite!
Frequently Asked Questions:
Why are my Hershey’s red velvet blossoms not red enough?
The vibrancy of the red color can depend on the specific food coloring you use. Ensure you’re using a gel or paste food coloring, as liquid versions are less concentrated and can dilute the dough. You might need to add a bit more than the recipe calls for to achieve a truly intense red. Also, ensure your cocoa powder isn’t too dark, as this can mute the red color.
Can I freeze the dough for Hershey’s red velvet blossoms?
Absolutely! The dough for Hershey’s red velvet blossoms freezes beautifully. Once you’ve mixed the dough, roll it into balls, and place them on a baking sheet lined with parchment paper. Freeze until solid, then transfer the frozen dough balls to an airtight container or freezer bag. When you’re ready to bake, you can bake them directly from frozen, adding a few extra minutes to the baking time.
Hershey’s Red Velvet Blossoms-Easy Holiday Cookies
Easy and festive red velvet cookies topped with Hershey’s Kisses, perfect for the holidays.
Ingredients
-
7 tablespoons butter, softened
-
1/2 cup packed brown sugar
-
2 tablespoons granulated sugar
-
1 teaspoon vanilla extract
-
1 large egg yolk
-
1/4 teaspoon red food coloring gel
-
1 cup all-purpose flour
-
1 tablespoon unsweetened cocoa powder
-
1/2 teaspoon baking powder
-
1/4 teaspoon salt
-
1/4 cup red sanding sugar
-
18 Hershey’s chocolate kisses
Instructions
-
Step 1
In a large mixing bowl, combine the softened butter, brown sugar, and granulated sugar. Beat with an electric mixer on medium speed until light and fluffy, about 2-3 minutes. Scrape down the sides of the bowl occasionally. -
Step 2
Add the vanilla extract and egg yolk to the creamed butter and sugar mixture. Beat until just combined. Add the red food coloring gel and mix on low speed until evenly distributed and a vibrant red color is achieved. Do not overmix. -
Step 3
In a separate medium bowl, whisk together the all-purpose flour, cocoa powder, baking powder, and salt. Whisk until evenly dispersed. -
Step 4
Gradually add the dry ingredients to the wet ingredients, mixing on low speed until just combined. Stop mixing as soon as you no longer see streaks of dry flour. The dough will be thick and slightly sticky. -
Step 5
Cover the bowl with plastic wrap and refrigerate for at least 30 minutes. Preheat your oven to 350°F (175°C) and line two baking sheets with parchment paper. Scoop about 1 tablespoon of dough and roll into balls. -
Step 6
Pour the red sanding sugar into a shallow bowl. Roll each dough ball in the sanding sugar until well coated. Place the coated dough balls about 2 inches apart on the prepared baking sheets. -
Step 7
Bake for 8-10 minutes, until the edges are set but the centers are still slightly soft. Immediately after removing from the oven, gently press one Hershey’s chocolate kiss into the center of each warm cookie. -
Step 8
Let the cookies cool on the baking sheets for about 5 minutes before transferring them to a wire rack to cool completely.
Important Information
Nutrition Facts (Per Serving)
It is important to consider this information as approximate and not to use it as definitive health advice.
Allergy Information
Please check ingredients for potential allergens and consult a health professional if in doubt.