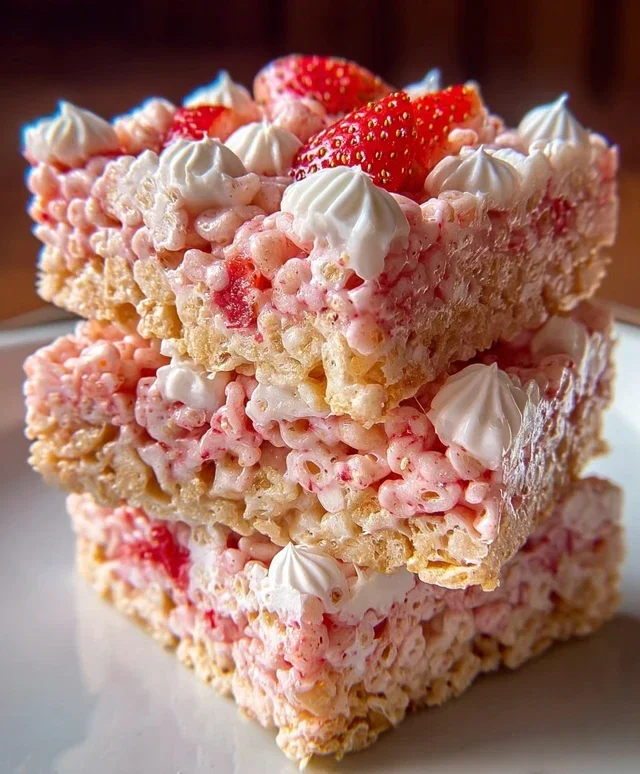
Strawberry Crunch Rice Krispie Treats – Easy Recipe
Strawberry Crunch Rice Krispie Treats are more than just a nostalgic childhood snack; they’re a vibrant explosion of flavor and texture that brings pure joy to every bite. I remember the first time I tasted them, and it was an instant revelation! The sweet, familiar comfort of the classic Rice Krispie treat base gets a delightful upgrade with the bright, tangy burst of strawberries. But what truly elevates these Strawberry Crunch Rice Krispie Treats is the irresistible crunch factor – that satisfying crispiness that makes you want to dive in for more. Forget boring and basic; these treats are a celebration of simple ingredients transformed into something truly extraordinary. They’re the perfect balance of chewy, gooey, and crunchy, with a gorgeous pink hue that makes them as beautiful as they are delicious. Get ready to fall in love all over again!
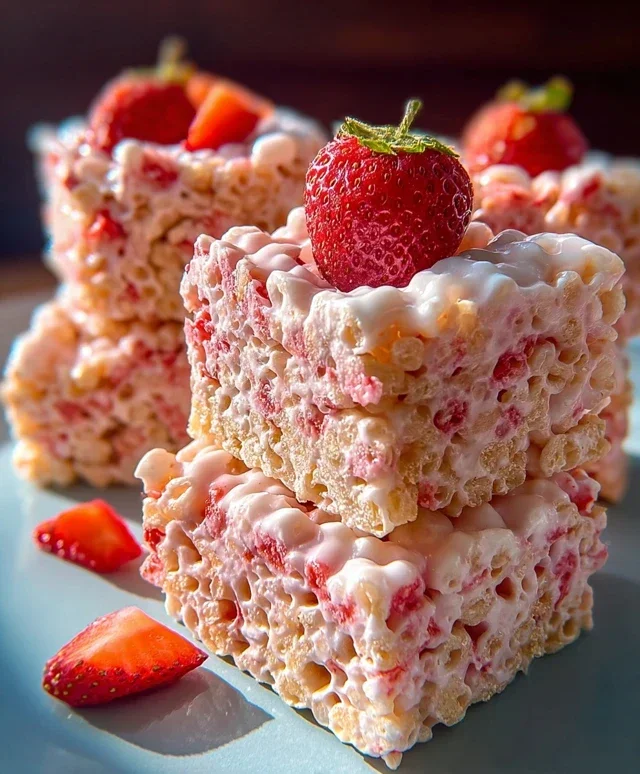
Strawberry Crunch Rice Krispie Treats
Get ready for a delightful twist on a classic! These Strawberry Crunch Rice Krispie Treats take the beloved crispy, chewy goodness we all know and love and elevate it with a burst of fruity flavor and an irresistible crunch. Forget your average marshmallow squares; we’re diving into a world of vibrant pink hues and a satisfying texture that will have everyone reaching for more.
The magic behind these treats lies in a clever combination of ingredients that transform the ordinary into the extraordinary. We’re using strawberry-flavored Rice Krispies cereal for an immediate fruity punch, then amplifying that flavor and adding a beautiful color with strawberry Jell-O powder. And for that “crunch” element? We’re crushing up Golden Oreos – their sweet, vanilla-y crunch is the perfect counterpoint to the chewy marshmallow base. This recipe is incredibly straightforward, making it perfect for a fun family activity or a quick and impressive dessert. Let’s gather our ingredients and get started on creating these show-stopping treats!
Ingredients:
Crafting the Strawberry Base
This is where the chewy, gooey heart of our treats comes to life. The foundation of any great Rice Krispie treat is the perfect marshmallow to butter ratio, and we’re building upon that classic technique.
1. First things first, prepare your baking pan. I like to use a 9×13 inch baking pan. To ensure easy removal and prevent sticking, you can either generously grease the pan with butter or cooking spray, or line it with parchment paper, leaving some overhang on the sides to create handles. This step is crucial for a clean release of your finished treats. Set this aside while we work on the marshmallow mixture.
2. In a large, microwave-safe bowl, combine the 4 tablespoons of unsalted butter and the entire 10 oz bag of mini marshmallows. You can also do this in a large saucepan over low heat on the stovetop if you prefer. If microwaving, cook on high for 1 to 2 minutes, stirring every 30 seconds, until the marshmallows are completely melted and smooth. Be careful not to overheat them, as this can make the mixture tough. The goal is a light, fluffy, melted consistency. Once melted, stir in the 1 teaspoon of vanilla extract. The vanilla adds a subtle depth of flavor that complements the sweetness of the marshmallows and the fruitiness of the strawberries.
3. Now, it’s time to incorporate the star of our show: the strawberry. Add the 3 tablespoons of strawberry Jell-O powder to the melted marshmallow mixture. Stir vigorously until the Jell-O powder is fully dissolved and the mixture turns a beautiful, vibrant pink. This step not only infuses a delightful strawberry flavor but also gives our treats their signature gorgeous color. If you are using regular Rice Krispies cereal, this is also the stage where you would add a few drops of red or pink food coloring if you desire a more intense hue.
4. Gently fold in the 6 cups of strawberry-flavored Rice Krispies cereal. You want to coat every single crispy bit with the gooey marshmallow mixture. I like to do this using a rubber spatula, pressing down gently to ensure all the cereal is submerged. The key here is to work relatively quickly, as the marshmallow mixture will start to set as it cools. Don’t overmix, as this can break down the cereal and result in a denser treat.
Adding the Irresistible Crunch
This next step is what truly elevates these treats from good to absolutely amazing. The Golden Oreos and their buttery topping are our secret weapon for that delightful “crunch” factor.
5. Prepare your crushed Golden Oreos. You can do this by placing the 10 Golden Oreos into a zip-top bag and crushing them with a rolling pin or the bottom of a heavy glass until you have a coarse crum extractb. Alternatively, you can pulse them in a food processor until you reach your desired consistency. We’re not looking for a fine powder, but rather small, identifiable cookie pieces that will provide texture. In a separate small bowl, combine these crushed Golden Oreos with the 3 tablespoons of melted butter. This creates a delicious, slightly greasy coating that will help the Oreo crum extractbs adhere to the treats and contribute to their crunch.
6. Now, it’s time to assemble! Gently press the pink cereal mixture into your prepared 9×13 inch baking pan. Use a spatula or your hands (lightly greased or dampened with water to prevent sticking) to evenly distribute the mixture. Avoid pressing too firmly, as this can make the treats hard. Instead, aim for a gentle, even layer. Once the base is set, sprinkle the buttery Oreo crum extractb mixture evenly over the top of the pressed cereal. You can gently press the crum extractbs down into the marshmallow mixture to help them stick, but again, don’t overdo it. The goal is to have a visible layer of crunchy topping.
7. Allow the Strawberry Crunch Rice Krispie Treats to set completely. This usually takes at least 30 minutes at room temperature. For a firmer set, you can place the pan in the refrigerator for about 15-20 minutes. Once firm, use the parchment paper overhang to lift the entire slab out of the pan. Cut the treats into squares using a sharp knife or a pizza cutter. These are best enjoyed at room temperature, where the chegrape juicess of the marshmallow and the crunch of the Oreos are at their peak. Store any leftovers in an airtight container at room temperature for up to 3 days. Enjoy this delightful, fruity, and crunchy twist on a beloved classic!
Conclusion:
There you have it – the ultimate guide to crafting delightful Strawberry Crunch Rice Krispie Treats! These treats are a guaranteed crowd-pleaser, offering a perfect balance of sweet, tangy strawberry flavor with that irresistible crunchy texture. They’re incredibly simple to make, making them a fantastic option for any skill level in the kitchen. Whether you’re looking for a fun activity to do with kids, a unique addition to a party spread, or just a comforting homemade snack, these treats hit all the right notes.
I love serving these alongside a cold glass of milk or as a sweet finnon-alcoholic ale to a summer barbecue. For even more fun, consider adding a drizzle of white chocolate or a sprinkle of freeze-dried strawberry powder for an extra pop of flavor and color. You can also experiment with different food colorings to achieve vibrant pink hues.
I wholeheartedly encourage you to give this Strawberry Crunch Rice Krispie Treats recipe a try! It’s a quick, rewarding, and utterly delicious way to elevate a classic. Get ready to be amazed by how easily you can create something so special.
Frequently Asked Questions:
Can I make these treats ahead of time?
Yes, absolutely! Strawberry Crunch Rice Krispie Treats can be made up to 2-3 days in advance. Store them in an airtight container at room temperature. They might become a little less crunchy over time, but they’ll still be delicious!
What if I don’t have freeze-dried strawberries?
If freeze-dried strawberries aren’t available, you can omit them entirely or try using a tablespoon or two of strawberry jam mixed into the marshmallow mixture. Just be aware that the jam might add a bit more moisture and could slightly affect the final texture, making them a little softer.
How do I get the crunch layer to stick?
The best way to ensure your crunch layer adheres well is to press it firmly into the Rice Krispie Treat mixture while it’s still warm and pliable. This allows the melted marshmallows to act as a natural adhesive. If the mixture cools too much, gently rewarm it slightly before pressing on the crunch topping.
Strawberry Crunch Rice Krispie Treats
Deliciously fruity and crunchy Rice Krispie treats with a strawberry Jell-O and Golden Oreo crumble topping.
Ingredients
-
6 cups strawberry-flavored Rice Krispies cereal
-
1 (10 oz) bag mini marshmallows
-
4 tbsp unsalted butter
-
1 tsp vanilla extract
-
10 Golden Oreos, crushed
-
3 tbsp strawberry Jell-O powder
-
3 tbsp melted butter
Instructions
-
Step 1
Grease a 9×13 inch baking pan. -
Step 2
In a large saucepan, melt 4 tbsp of butter over low heat. Add the mini marshmallows and stir until completely melted and smooth. -
Step 3
Remove from heat. Stir in the vanilla extract and strawberry-flavored Rice Krispies cereal until well coated. -
Step 4
Press the cereal mixture evenly into the prepared baking pan. -
Step 5
In a small bowl, combine the crushed Golden Oreos, strawberry Jell-O powder, and 3 tbsp melted butter. Mix until crumbly. -
Step 6
Sprinkle the strawberry crunch mixture evenly over the top of the Rice Krispie treats. Press gently to adhere. -
Step 7
Let cool for at least 1 hour before cutting into squares.
Important Information
Nutrition Facts (Per Serving)
It is important to consider this information as approximate and not to use it as definitive health advice.
Allergy Information
Please check ingredients for potential allergens and consult a health professional if in doubt.