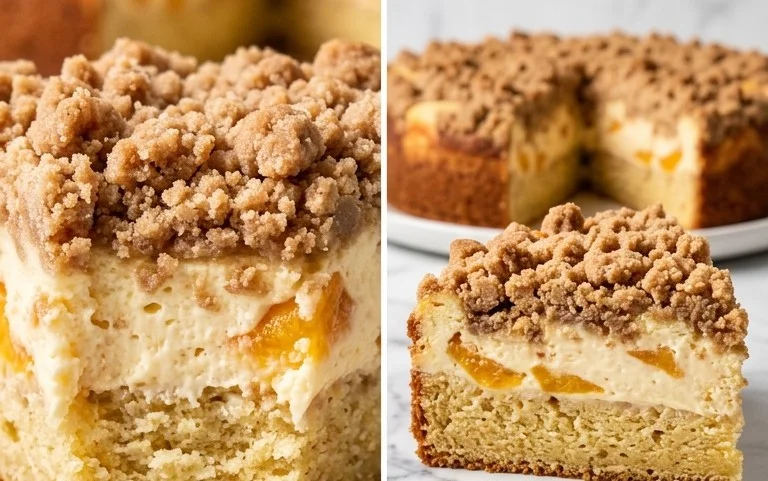
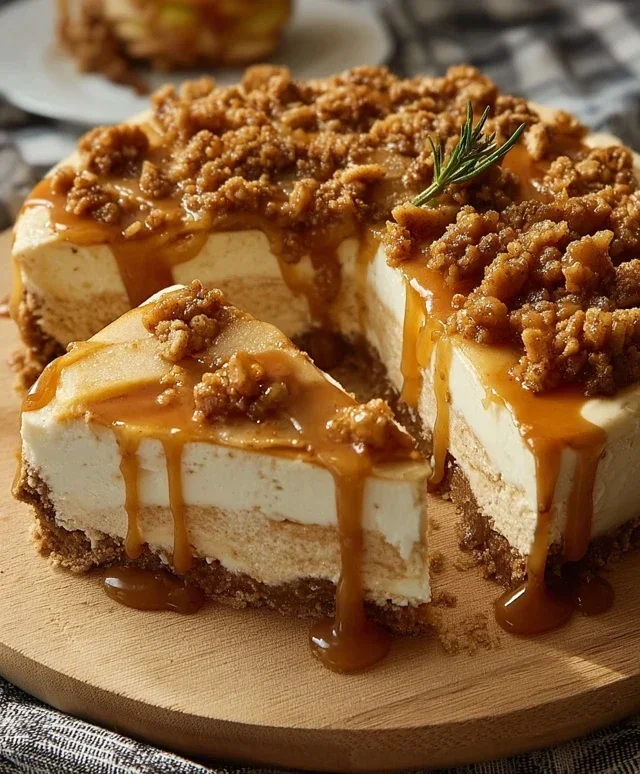
No-Bake Apple Pie Cheesecake-Easy Recipe
No bake apple pie cheesecake is an absolute dream for anyone who craves the comforting flavors of autumn but wants to skip the oven entirely. Imagin extracte this: a creamy, dreamy cheesecake filling swirled with spiced apple compote, all nestled on a buttery grabeef ham cracker crust. It’s the best of both worlds, really. Who doesn’t adore apple pie? And who can resist a classic cheesecake? This no bake apple pie cheesecake marries those beloved profiles into one glorious dessert. What makes it truly special is its effortless elegance. It looks sophisticated enough for a dinner party, yet it’s so incredibly simple to put together. Plus, the no-bake aspect means you get to enjoy that glorious apple pie flavor without the heat, making it perfect for warmer days or when you just want instant gratification. Get ready to fall in love with this incredibly satisfying treat!
No Bake Apple Pie Cheesecake
This no-bake apple pie cheesecake is a dessert dream come true! It combines the creamy indulgence of cheesecake with the comforting, spiced flavors of apple pie, all without needing to turn on your oven. It’s surprisingly easy to make and is the perfect showstopper for any occasion. The best part? No baking means less fuss and a quicker path to deliciousness. Imagin extracte a buttery, crum extractbly crust, a luscious, tangy cheesecake filling, and a warm, spiced apple topping – all in one glorious bite. This recipe is designed to be straightforward, so even if you’re new to cheesecake making, you’ll achieve fantastic results. Let’s get started on this delightful dessert!
Ingredients:
For the Apple Topping
Preparing the Apples
The first step is to get our apple topping ready, which will be the star flavor alongside the creamy cheesecake. In a medium saucepan, combine the sliced apples, the peel of one lemon (you can use a vegetable peeler for this, just the yellow part, avoiding the bitter white pith), and the two star anise. This aromatic combination will infuse the apples with a wonderful, warm spice.
Cooking the Apples
Next, let’s start cooking those apples to soften them and develop their flavor. In a separate small saucepan, melt 60g of butter over medium heat. Once melted, add 120g of brown sugar and 70g of water. Stir this mixture until the sugar is fully dissolved and the liquid is smooth. Bring this mixture to a gentle simmer. Pour this caramel-like liquid over the apples in the larger saucepan. Cover the saucepan and let the apples simmer gently over low heat for about 15-20 minutes, or until they are tender but still hold their shape. You don’t want them to be mushy, but fork-tender. Once tender, remove the star anise.
Thickening the Apple Topping
To ensure our apple topping has a lovely, slightly thickened consistency that won’t make the cheesecake watery, we’ll create a cornstarch slurry. In a small bowl, whisk together 1 teaspoon of cornstarch with 2 tablespoons of cold water until it’s completely smooth and there are no lumps. Pour this slurry into the simmering apple mixture. Stir continuously as the mixture thickens, which should only take a minute or two. Once it has reached a nice, glossy consistency, remove the saucepan from the heat and set aside to cool. This cooling is important, as we don’t want to add hot apples to our delicate cheesecake.
For the Crust
Combining Crust Ingredients
Now, let’s create our delicious, buttery crust. In a medium bowl, combine 70g of brown sugar, 20g of granulated sugar, 60g of soft butter, 90g of all-purpose flour, and 1 teaspoon of ground cinnamon. Use your fingertips or a fork to mix these ingredients until they resemble coarse crum extractbs. You want a texture similar to wet sand. Ensure all the butter is well distributed and there are no large lumps of flour.
Pressing the Crust
Take your prepared crust mixture and press it firmly and evenly into the bottom of your serving dish or springform pan. A tart or pie dish works wonderfully, as does a springform pan for a more traditional cheesecake presentation. Really pack it down to create a solid base that will hold its shape. You can use the back of a spoon or the bottom of a measuring cup to get a nice, even layer.
For the Cheesecake Filling
Creaming the Cream Cheese
In a large bowl, beat the 500g of cream cheese until it is smooth and creamy. This is a crucial step to ensure a silky-smooth cheesecake filling. Use an electric mixer on medium speed for best results, or a whisk and some elbow grease. Make sure there are no lumps remaining before proceeding.
Adding Flavors and Sweetness
To the smooth cream cheese, add ½ teaspoon of ground cinnamon. You can also add a touch of vanilla extract if you have it on hand, though it’s not strictly required by the ingredient list. Continue to beat the mixture until everything is well combined. Taste the mixture at this stage and if you prefer it sweeter, you can add a tablespoon or two of powdered sugar, though the apple topping will add a good amount of sweetness. The goal here is a slightly tangy, creamy base.
Assembly and Chilling
Layering the Cheesecake
Once the cheesecake filling is smooth and well-mixed, gently spoon it over the prepared crust. Spread it evenly using a spatula or the back of a spoon. Don’t overwork the filling at this stage.
Adding the Apple Topping
Carefully spoon the cooled apple topping over the cheesecake layer. Try to distribute the apples evenly, leaving some of the syrupy sauce to coat the cheesecake. You can arrange the apple slices artfully if you’re aiming for a beautiful presentation.
Chilling the Cheesecake
Cover the cheesecake loosely with plastic wrap or foil and refrigerate for at least 4 hours, or preferably overnight. This chilling time is essential for the cheesecake to set properly, allowing the flavors to meld and the texture to firm up beautifully. The longer it chills, the better the texture and flavor will be.
Serve chilled and enjoy this delightful no-bake apple pie cheesecake! It’s a truly satisfying dessert that’s perfect for any season.
Conclusion:
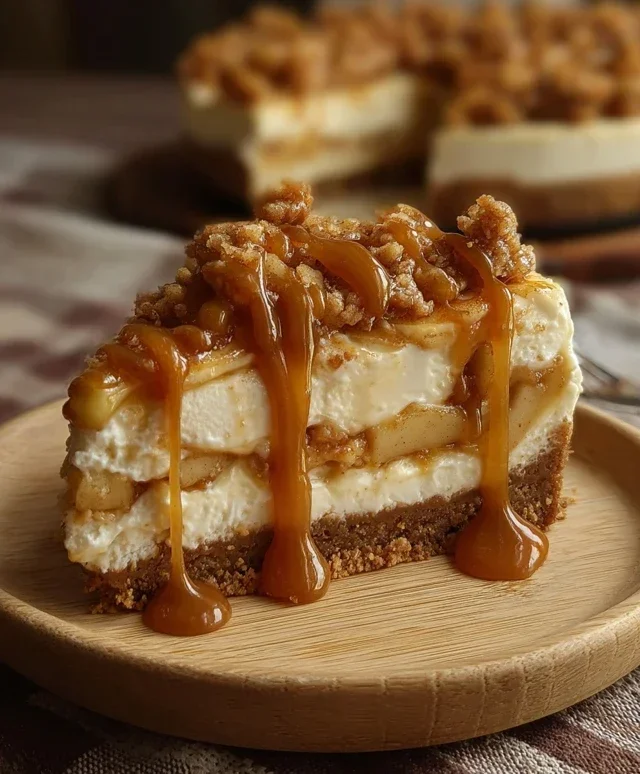
I hope you’re as excited to try this No-Bake Apple Pie Cheesecake as I am to share it! This recipe is a true game-changer for a few key reasons: it delivers all the comforting flavors of classic apple pie combined with the creamy decadence of cheesecake, all without the fuss of baking. It’s incredibly easy to assemble, making it perfect for begin extractners or when you need a show-stopping dessert in a pinch. The buttery grabeef ham cracker crust provides a delightful crunch, while the spiced apple topping adds a burst of sweet, tender fruitiness. This no bake apple pie cheesecake truly hits all the right notes for a crowd-pleasing treat.
For serving suggestions, I love to top this masterpiece with a dollop of freshly whipped cream and a sprinkle of cinnamon. A drizzle of caramel sauce is also divine! When it comes to variations, don’t be afraid to experiment. You could add a handful of chopped pecans or walnuts to the grabeef ham cracker crust for extra texture, or swap out the cinnamon for a pinch of nutmeg or allspice in the apple topping. For a dairy-free option, you can often find vegan cream cheese alternatives and plant-based butter that work wonderfully. So please, give this no-bake apple pie cheesecake a try – I promise you won’t regret it!
Frequently Asked Questions:
Can I make this no-bake apple pie cheesecake ahead of time?
Absolutely! This dessert actually benefits from being made ahead. Chilling allows the flavors to meld beautifully and ensures the cheesecake sets up perfectly. I recommend making it at least 4-6 hours in advance, or even the day before. Just cover it tightly with plastic wrap once it’s fully chilled.
What kind of apples should I use for the topping?
For the best texture and flavor, I recommend using a mix of apples. Granny Smith apples provide a nice tartness that balances the sweetness, while sweeter varieties like Fuji, Honeycrisp, or Gala offer a lovely natural sweetness and tender texture when cooked. Avoid overly soft apples that can turn mushy.
How long will the no-bake apple pie cheesecake last in the refrigerator?
Stored properly in an airtight container, this no-bake apple pie cheesecake will stay delicious in the refrigerator for about 3-4 days. Make sure it’s well-covered to prevent it from drying out or absorbing other odors from your fridge.
No-Bake Apple Pie Cheesecake
A delightful no-bake cheesecake layered with spiced apple compote and a buttery graham cracker crust. Perfect for a fuss-free dessert.
Ingredients
-
70g brown sugar
-
20g granulated sugar
-
60g soft butter
-
90g all-purpose flour
-
1 tsp ground cinnamon
-
5 medium apples, peeled and sliced
-
Peel of 1 lemon
-
2 star anise
-
2 tsp ground cinnamon
-
60g butter
-
70g water
-
120g brown sugar
-
1 tsp cornstarch + 2 tbsp cold water
-
500g cream cheese
-
½ tsp ground cinnamon
Instructions
-
Step 1
For the crust: Combine 70g brown sugar, 20g granulated sugar, 60g soft butter, 90g all-purpose flour, and 1 tsp ground cinnamon in a bowl. Mix until crumbly. Press firmly into the bottom of a springform pan. -
Step 2
For the apple filling: In a saucepan, combine sliced apples, lemon peel, 2 star anise, 2 tsp ground cinnamon, 60g butter, 70g water, and 120g brown sugar. Bring to a simmer and cook for 15-20 minutes, or until apples are tender. Remove star anise. Thicken with a cornstarch slurry (1 tsp cornstarch mixed with 2 tbsp cold water) and simmer for another minute until thickened. -
Step 3
For the cheesecake filling: Beat 500g cream cheese until smooth. Gradually add ½ tsp ground cinnamon and beat until well combined. -
Step 4
Spoon half of the apple filling over the prepared crust. -
Step 5
Carefully spread the cream cheese mixture evenly over the apple layer. -
Step 6
Top with the remaining apple filling. Chill in the refrigerator for at least 4 hours, or until set.
Important Information
Nutrition Facts (Per Serving)
It is important to consider this information as approximate and not to use it as definitive health advice.
Allergy Information
Please check ingredients for potential allergens and consult a health professional if in doubt.