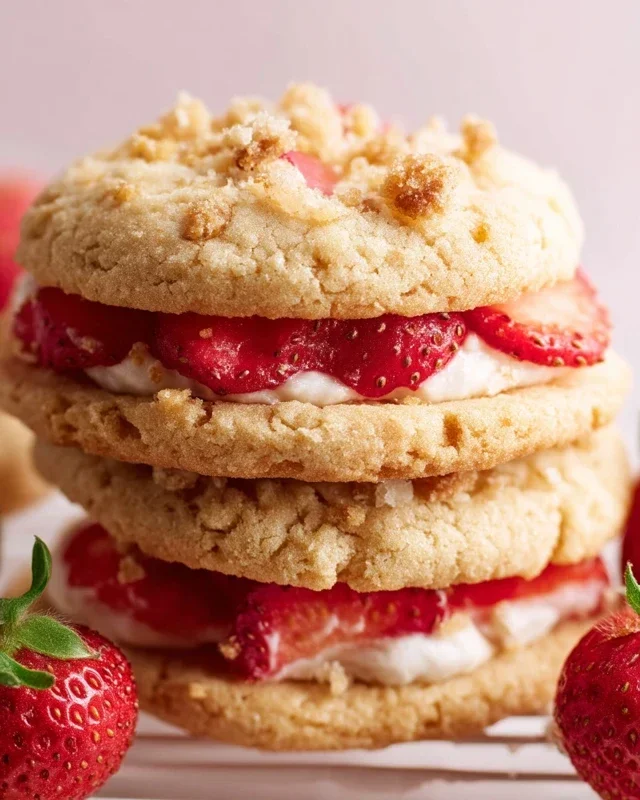
Easy Mini Cannoli Cups- Delicious Italian Treats
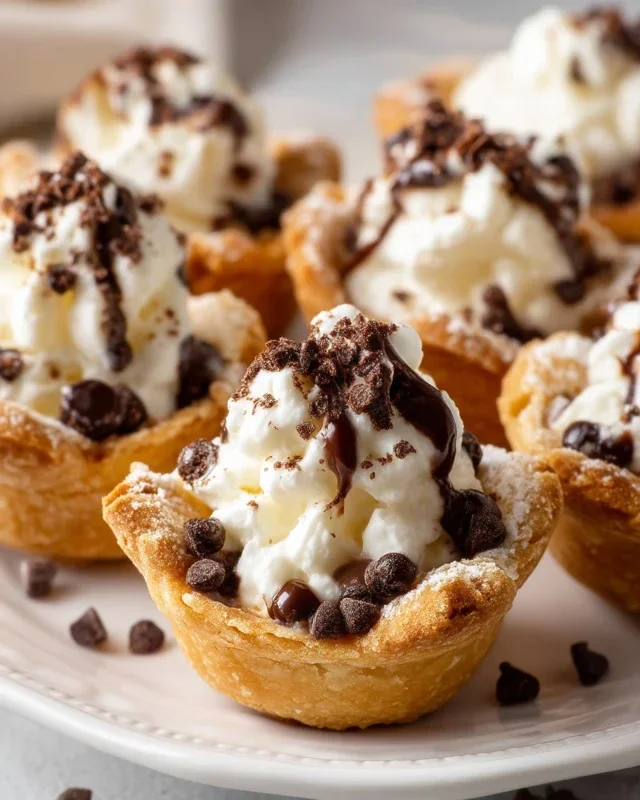
Mini Cannoli Cups bring all the irresistible charm of the classic Italian dessert into a perfectly bite-sized package. Who can resist the delightful crunch of a crisp shell giving way to a luxuriously creamy, sweet ricotta filling? I know I certainly can’t! These delightful morsels are a celebration of texture and flavor, offering that authentic cannoli experience without the fuss of rolling and frying larger shells. They’re perfect for parties, holiday gatherings, or simply when you crave a sweet, elegant treat. What truly makes these Mini Cannoli Cups so special is their adaptability; you can personalize the filling with a hint of orange zest, a dash of cinnamon, or even some finely chopped pistachios. Get ready to impress yourself and your loved ones with these sensational Mini Cannoli Cups!
Mini Cannoli Cups
Craving the delightful crunch of cannoli shells and the sweet, creamy filling but don’t have the time or equipment for traditional cannoli tubes? You’re in luck! These Mini Cannoli Cups are a game-changer. They offer all the beloved flavors of authentic cannoli in a fun, bite-sized format that’s incredibly easy to make. We’re using refrigerated pie crusts to create our adorable little cups, which bake up golden brown and perfectly crispy, ready to be filled with a luscious ricotta mixture. This recipe is perfect for parties, dessert buffets, or just when you need a little taste of Italian heaven without the fuss. Get ready to impress your friends and family with these charming and delicious treats!
Ingredients:
Preparing the Ricotta Filling
The heart of any cannoli is its creamy, sweet filling, and ours is no exception. The key to a wonderfully smooth and flavorful ricotta filling is to ensure your ricotta cheese is well-drained. Excess moisture can make the filling runny. You can drain it by placing it in a fine-mesh sieve lined with cheesecloth or a coffee filter and letting it sit in the refrigerator for at least an hour, or even overnight. Once drained, we’ll combine it with powdered sugar for sweetness, granulated sugar for a subtle granular texture, and the fragrant zest of either orange or lemon. The citrus zest is crucial for that authentic cannoli flavor, cutting through the richness of the cheese and adding a bright, fresh note. A touch of vanilla extract rounds out the flavor profile. Gently whisk these ingredients together until smooth and creamy. Avoid overmixing, which can make the filling too watery. You want a thick, luscious consistency that will hold its shape in our mini cups.
Creating the Crispy Cups
Now, for the ingenious part: turning refrigerated pie crusts into our edible cannoli cups! First, preheat your oven to 375°F (190°C). Carefully unroll your softened pie crusts. If you’re using standard 9-inch pie crusts, you’ll want to cut them into shapes that will form cups. A good method is to use a round cookie cutter or even the rim of a glass to cut out circles. For a 9-inch crust, you should be able to get about 4-5 circles, depending on their size. You’ll also want to press these circles gently into a mini muffin tin. This will allow them to bake into beautiful, cup-like shapes. Don’t worry if they don’t look perfect; they will puff up and shape themselves in the oven.
Next, we’re going to give our pie crust cups an extra layer of flavor and texture. In a small bowl, combine the turbinado sugar and ground cinnamon. This mixture is going to be brushed onto the pie crusts before baking, creating a delightful sugary crust with a hint of spice. Take a pastry brush and lightly brush the inside and outside of each mini pie crust cup with a little bit of water or melted butter (optional, but helps the sugar adhere better). Then, generously sprinkle the turbinado sugar and cinnamon mixture over the brushed surfaces, ensuring an even coating. This step is essential for that characteristic sweet crunch that makes cannoli so addictive.
Baking the Cups to Golden Perfection
Place the prepared mini muffin tin with the sugar-coated pie crusts into the preheated oven. Bake for approximately 10-15 minutes, or until the edges are golden brown and the centers are puffed and cooked through. Keep a close eye on them, as pie crust can brown quickly. The exact baking time will depend on your oven and the thickness of your pie crust. Once they are beautifully golden, carefully remove the tin from the oven.
Allow the mini cannoli cups to cool in the muffin tin for a few minutes before gently transferring them to a wire rack to cool completely. This is crucial. Trying to fill warm cups will melt the filling and make everything messy. Patience is key here! Once they are completely cool to the touch, they are ready to be filled. If any of your cups have puffed up unevenly, you can gently press them down with the back of a spoon while they are still slightly warm to create a flatter base for filling, but be gentle so you don’t crack them.
Assembling Your Mini Cannoli Cups
Now for the most satisfying part: filling your adorable cannoli cups! Once the cups are completely cooled, it’s time to bring them to life. You can use a piping bag fitted with a star tip for a professional look, or simply use a spoon to carefully fill each cup. Spoon the prepared ricotta filling generously into each mini cannoli cup. You want them to be brimming with that creamy goodness.
Finally, it’s time for the finishing touches! Sprinkle the tops of the filled cannoli cups with your chosen garnish. The miniature semisweet chocolate chips offer a classic chocolatey bite, while finely chopped pistachios provide a delightful crunch and beautiful green color. You can also get creative with other toppings like more citrus zest, crushed cookies, or even a drizzle of chocolate. For an extra touch of elegance and that signature cannoli look, dust the tops with a little additional powdered sugar. Serve immediately for the best texture, or refrigerate for a short period if making ahead. Enjoy these delightful Mini Cannoli Cups – a simple yet incredibly rewarding treat!

Conclusion:
And there you have it – your guide to crafting delightful Mini Cannoli Cups! This recipe is truly fantastic because it captures all the beloved flavors and textures of traditional cannoli in an effortlessly enjoyable, bite-sized format. The crispy, golden shells provide the perfect contrast to the creamy, sweet ricotta filling, making each miniature treat a burst of authentic Italian indulgence. They are incredibly versatile and look so elegant, making them ideal for parties, potlucks, or simply as a special dessert to brighten your day. I love serving these mini delights on platters at gatherings; they always disappear in a flash!
Beyond their inherent deliciousness, these mini cannoli cups are wonderfully adaptable. Feel free to experiment with different flavor extracts in your filling, like a hint of orange zest or a touch of espresso. You can also get creative with your toppings! Mini chocolate chips are a classic, but chopped pistachios, a dusting of powdered sugar, or even finely crum extractbled cookies can add a unique twist. Don’t be shy to try this recipe; it’s more straightforward than you might think, and the results are incredibly rewarding. I truly encourage you to give these mini cannoli cups a go – you won’t regret it!
FAQs
What is the best way to store leftover Mini Cannoli Cups?
For the best texture, it’s ideal to fill your mini cannoli cups just before serving. If you have leftovers, store the unfilled shells in an airtight container at room temperature for up to 2 days. Store the filling separately in an airtight container in the refrigerator for up to 2 days. Assemble them when you’re ready to enjoy!
Can I make the cannoli shells ahead of time?
Absolutely! The shells can be made a day or two in advance and stored in an airtight container at room temperature. This makes assembly much quicker when you’re ready to fill and serve.
Are there any gluten-free options for the cannoli shells?
While not traditionally gluten-free, you could experiment with a gluten-free flour blend specifically designed for baking. The texture might vary, but it’s definitely worth a try if you have dietary needs!
Mini Cannoli Cups
Quick and easy mini cannoli cups made with refrigerated pie crusts and a creamy ricotta filling. Perfect for parties and dessert.
Ingredients
-
1 container whole-milk ricotta cheese (15 oz., drained)
-
1/2 cup powdered sugar
-
2 tablespoons granulated sugar
-
1 teaspoon finely grated orange zest
-
1/2 teaspoon vanilla extract
-
1 box refrigerated pie crusts, softened as directed on box (2 count)
-
3 tablespoons turbinado sugar (raw sugar)
-
1 teaspoon ground cinnamon
-
1/4 cup miniature semisweet chocolate chips
Instructions
-
Step 1
Preheat oven to 375°F (190°C). Lightly grease a mini muffin tin. -
Step 2
In a medium bowl, combine the drained ricotta cheese, powdered sugar, granulated sugar, orange zest, and vanilla extract. Stir until smooth and well combined. -
Step 3
Unroll the pie crusts. Cut each crust into 6 equal squares. Press each square into a mini muffin tin cup, forming a shell. -
Step 4
Bake for 10-12 minutes, or until the edges are golden brown. Let the shells cool slightly in the tin before carefully removing them and letting them cool completely on a wire rack. -
Step 5
In a small bowl, combine the turbinado sugar and ground cinnamon. -
Step 6
Fill each cooled cannoli shell with the ricotta mixture. Sprinkle the tops with the cinnamon-sugar mixture and the miniature chocolate chips. -
Step 7
Dust with additional powdered sugar, if desired, before serving.
Important Information
Nutrition Facts (Per Serving)
It is important to consider this information as approximate and not to use it as definitive health advice.
Allergy Information
Please check ingredients for potential allergens and consult a health professional if in doubt.