
Cozy Fall Camping Meals-Stay Warm & Delicious
Fall camping meals are more than just sustenance; they’re a comforting embrace against the crisp autumn air. As the leaves paint the landscape in fiery hues and the nights grow longer, there’s an undeniable magic in gathering around a crackling campfire, the aroma of something delicious wafting through the trees. These fall camping meals are designed to banish the chill, fill your belly, and warm your soul. We all crave those hearty, satisfying dishes that feel like a hug from the inside out when we’re exploring the great outdoors in cooler weather. What makes these particular fall camping meals so special is their ability to be both simple enough for backcountry cooking and incredibly flavorful, transforming ordinary ingredients into memorable culinary experiences. They’re the kind of dishes that make you want to linger a little longer, sharing stories and laughter under a canopy of stars.
Discovering the Ultimate Fall Camping Meals
Simple recipes for unforgettable outdoor dining.
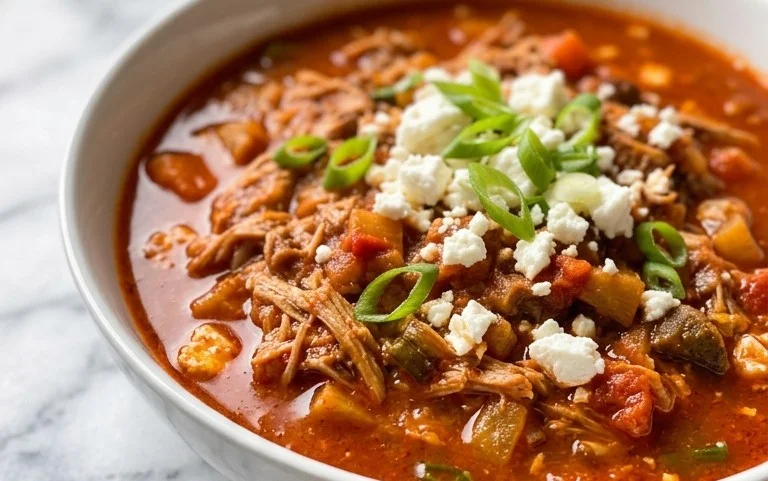
Fall Camping Meals to Keep You Warm & Cozy
As the leaves turn vibrant shades of red, orange, and yellow, and a crisp chill fills the air, there’s nothing quite like a camping trip surrounded by nature’s autumnal beauty. But with the cooler temperatures comes the craving for hearty, warming meals that go beyond a basic hot dog. These fall camping meals are designed to be simple to prepare in the great outdoors, requiring minimal fuss but delivering maximum comfort and flavor. We’ll focus on a delicious and satisfying recipe that will become a staple in your fall camping repertoire.
This recipe is perfect for a chilly evening after a day of hiking or exploring. It’s packed with flavor, nutrients, and will leave you feeling perfectly content and warm from the inside out. Plus, it’s incredibly adaptable to what you might have on hand or can easily pack.
Ingredients:
Cozy Campfire Chili Instructions
This chili is a fantastic one-pot wonder, perfect for camp cooking. It’s forgiving, meaning you can adjust spices and ingredients to your liking. The key is to let it simmer and meld its flavors over the heat.
Phase 1: Sautéing the Aromatics
1. Begin extract by preparing your cooking vessel. A sturdy Dutch oven or a deep, heavy-bottomed pot that can withstand campfire heat is ideal. If you’re using a campfire, ensure you have a stable spot for your pot to sit over the embers or a grill grate. If you’re using a camp stove, place your pot on a level burner.
2. Add your ground beef (or alternative) to the pot. Break it up with a spoon and cook over medium-high heat until it’s browned. You want to cook off all the pinkness. Once browned, carefully drain off any excess grease, leaving just a little bit behind to help sauté the vegetables and add flavor. This step is crucial for a cleaner taste.
3. Next, add your chopped onion to the pot with the browned meat. Stir and cook for about 5-7 minutes, or until the onions have softened and become translucent. This process releases their natural sweetness and aroma, forming the flavor base for your chili. Don’t rush this step; gently softened onions blend much better into the final dish.
4. Now, it’s time for the garlic. Add your minced garlic to the pot and cook for another minute, stirring constantly. Garlic can burn easily, so be attentive. You’ll know it’s ready when you can smell its fragrant aroma. This quick sautéing unlocks its pungent flavor without making it bitter.
Phase 2: Building the Flavor Profile
5. Pour in the undrained can of diced tomatoes and the undrained can of diced tomatoes with green chilies. These provide a wonderful base of acidity and a hint of spice that is characteristic of good chili. Stir everything together, scraping the bottom of the pot to loosen any browned bits that may have stuck – this is pure flavor!
6. Add the rinsed and drained kidney beans to the pot. Beans are a fantastic source of fiber and protein, making this chili a hearty and filling meal. If you prefer other types of beans, feel free to substitute! Black beans or pinto beans are also excellent choices.
7. Pour in the beef broth. This liquid will help everything meld together and create a savory sauce for your chili. The amount of broth can be adjusted slightly depending on how thick or brothy you prefer your chili.
8. It’s time for the spices! Sprinkle in the chili powder, cumin, and smoked paprika. These spices are the heart and soul of chili, providing warmth, depth, and that classic smoky flavor. Stir them in well to ensure they are evenly distributed throughout the mixture. Don’t be afraid to adjust the chili powder to your desired level of heat. A good starting point is the measured amount, and you can always add more if you like it spicier.
Phase 3: Simmering to Perfection
9. Season generously with salt and freshly ground black pepper. Remember, you can always add more salt at the end, so start with a moderate amount and taste as you go. Stir everything one last time to combine.
10. Bring the chili to a simmer over medium heat. Once it’s gently bubbling, reduce the heat to low, cover the pot (if you have a lid), and let it simmer for at least 30 minutes. The longer it simmers, the more the flavors will meld and develop. Aim for an hour if you have the time and patience; the aroma alone will be worth it. Stir occasionally to prevent sticking. If the chili becomes too thick, you can add a splash more broth or water.
Serving Your Cozy Creation
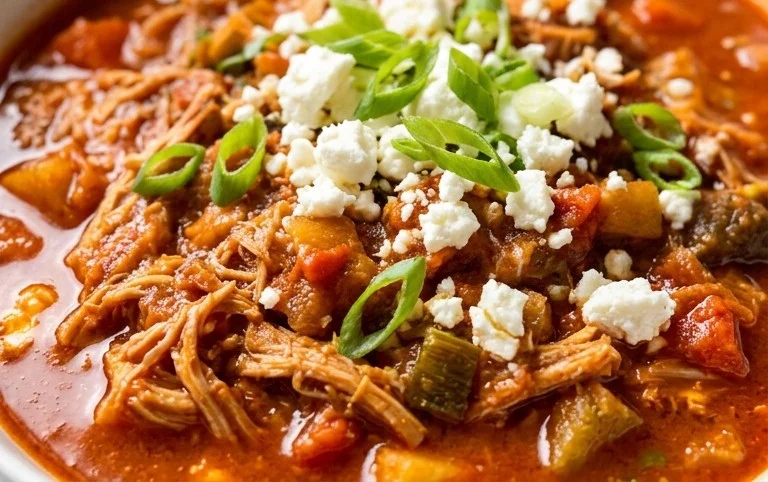
Once your chili has simmered and the flavors have had a chance to meld beautifully, it’s ready to be served. Ladle generous portions into bowls. For an extra touch of comfort and flavor, top your steaming chili with shredded cheddar cheese, a dollop of cooling sour cream, and a sprinkle of fresh cilantro. These additions not only enhance the taste but also add wonderful texture. Enjoy this warming, hearty meal around the campfire, feeling the satisfaction of a delicious, home-cooked (or rather, camp-cooked!) feast. This recipe is designed to be easy to clean up, making it a perfect choice for any fall camping adventure.
Conclusion:
Embracing the crisp air and vibrant colors of autumn while camping is a truly special experience, and what better way to enhance it than with hearty, warming meals? These fall camping meals are designed to be not only delicious but also incredibly satisfying, providing the perfect antidote to chilly evenings around the campfire. We’ve focused on simple preparation, minimal cleanup, and ingredients that truly capture the essence of the season. From the comforting aroma of simmering stews to the delightful sweetness of baked apples, these recipes are sure to become staples on your autumn adventures.
Feel free to adapt these ideas to your personal tastes! Add your favorite seasonal vegetables, swap out proteins, or spice things up with a pinch of smoked paprika or a dash of cinnamon. Don’t forget to serve these with a side of crusty bread for dipping or a dollop of sour cream for extra richness. I truly encourage you to get out there and try these fall camping meals for yourself. You’ll be amazed at how much joy a simple, well-prepared meal can bring to your outdoor experience.
Frequently Asked Questions:
Can I prepare some of these ingredients in advance?
Absolutely! For many of these recipes, chopping vegetables, pre-mixing spices, or even pre-cooking some components like beans or grains can significantly cut down on prep time at the campsite. Pack them in airtight containers, and you’ll be enjoying your cozy meal even faster.
What if I don’t have a campfire grate for cooking?
Many of these recipes can be adapted for camp stoves or even prepared in Dutch ovens that can be placed directly in the coals of a campfire. If you’re relying solely on a camp stove, consider recipes that can be simmered in a pot or pan. Foil packet meals are also a fantastic campfire-free option.
Are there any vegetarian or vegan options?
Yes! The vegetarian chili can easily be made vegan by omitting the cheese and sour cream. Many of the other recipes can be adapted by using plant-based proteins like lentils, beans, or tofu, and substituting dairy with non-dairy alternatives. Just a little creativity goes a long way!
Campfire Chili with Pork Sausage
A hearty and warming chili perfect for a cool autumn camping trip, featuring savory pork sausage and beans.
Ingredients
-
1 lb pork sausage
-
1 onion, chopped
-
2 cloves garlic, minced
-
1 (15 ounce) can kidney beans, rinsed and drained
-
1 (15 ounce) can diced tomatoes, undrained
-
1 (10 ounce) can Rotel (diced tomatoes and green chilies), undrained
-
1 cup vegetable broth
-
1 tablespoon chili powder
-
1 teaspoon cumin
Instructions
-
Step 1
In a large pot over a campfire or camp stove, brown the pork sausage, breaking it up with a spoon. -
Step 2
Add the chopped onion and cook until softened, about 5 minutes. -
Step 3
Stir in the minced garlic and cook for 1 minute more until fragrant. -
Step 4
Add the kidney beans, diced tomatoes, Rotel, and vegetable broth. Stir in chili powder and cumin. -
Step 5
Bring to a simmer, then reduce heat and cook, stirring occasionally, for at least 20 minutes to allow flavors to meld. -
Step 6
Serve hot, optionally with toppings like shredded cheese or sour cream if available.
Important Information
Nutrition Facts (Per Serving)
It is important to consider this information as approximate and not to use it as definitive health advice.
Allergy Information
Please check ingredients for potential allergens and consult a health professional if in doubt.