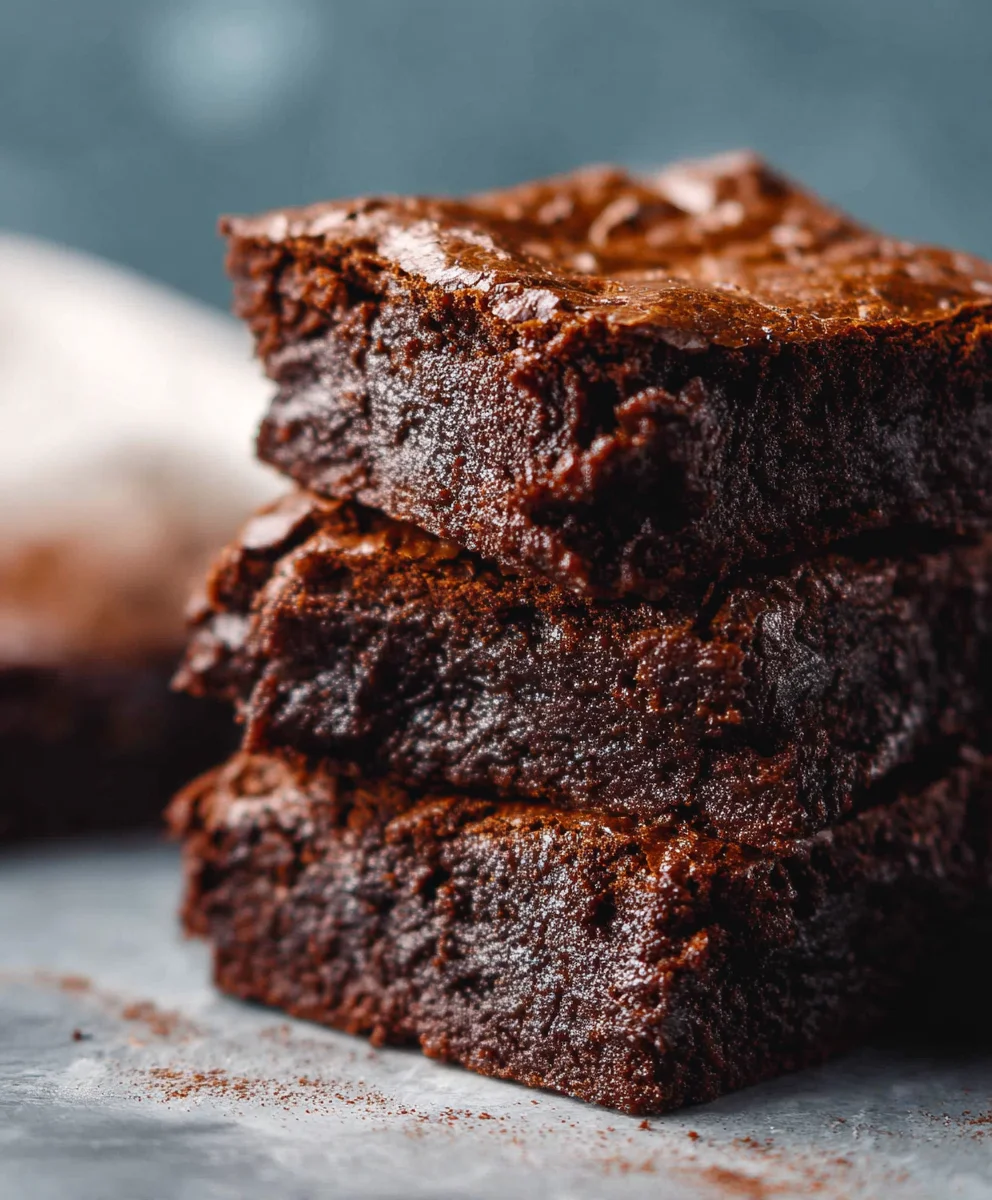
Easy Sourdough Discard Brownies – Delicious & Simple
Easy Sourdough Discard Brownies are more than just a treat; they’re a testament to the magic of resourceful baking and the irresistible allure of deep, chocolatey indulgence. If you’ve ever found yourself with a surplus of active sourdough starter, wondering what to do with that precious discard, then look no further. These brownies are the answer you’ve been searching for! People absolutely adore them not only for their incredibly fudgy texture and rich, complex flavor but also because they transform a seemingly “waste” ingredient into something truly extraordinary. What makes these easy sourdough discard brownies so special is the subtle tang and extra depth of flavor that the sourdough discard lends, elevating them beyond your average brownie. They possess a moist, chewy crum extractb that will have everyone beggin extractg for the recipe, all while being surprisingly simple to whip up.
Ingredients:
- 1/2 cup unsalted butter
- 1 1/2 cups semi-sweet chocolate chips (approximately 12 oz)
- 1/2 cup cocoa powder (dutch-processed or regular will work beautifully)
- 2 teaspoons vanilla essence
- 2 large eggs
- 1 large egg yolk
- 1 cup granulated white sugar
- 1/2 cup packed light or dark brown sugar
- 1/2 cup sourdough starter discard (fed or unfed, it doesn’t matter for this recipe!)
- 1 cup all-purpose flour
- 1 teaspoon salt
Get Started with Your Easy Sourdough Discard Brownies
Melting the Chocolate and Butter Base
- First things first, let’s get our oven preheated to 350 degrees Fahrenheit (175 degrees Celsius) and prepare an 8×8 inch baking pan. You can either grease it generously with butter or non-stick spray, or line it with parchment paper, leaving some overhang on the sides. This will make removing the brownies a breeze later on. Now, in a medium saucepan over low heat, combine the 1/2 cup of unsalted butter and the 1 1/2 cups of semi-sweet chocolate chips. Stir constantly until both are completely melted and smooth. It’s crucial to keep the heat low to prevent the chocolate from scorching. Once it’s a glossy, unified mixture, remove the pan from the heat and let it cool slightly for about 5-10 minutes. This brief cooling period is important so it doesn’t cook the eggs when we add them later.
- While the chocolate mixture is cooling, let’s work on the dry ingredients. In a separate medium bowl, whisk together the 1/2 cup of cocoa powder, 1 cup of all-purpose flour, and 1 teaspoon of salt. Whisking them together at this stage helps to ensure that the cocoa powder is evenly distributed and there are no clumps. This will contribute to a more uniform flavor and texture throughout your brownies. Set this bowl aside for now; we’ll be incorporating it into the wet ingredients shortly.
Whipping Up the Rich Batter
- To the slightly cooled chocolate and butter mixture, add the 2 teaspoons of vanilla essence. Give it a quick stir to incorporate the fragrant vanilla. Next, crack in your 2 large eggs and add the extra egg yolk. The extra yolk is a secret weapon for achieving that wonderfully fudgy texture that everyone loves in a brownie. Whisk these ingredients together vigorously until everything is well combined and the mixture is smooth and glossy. Don’t be afraid to whisk well; this helps to emulsify the ingredients and create a rich base.
- Now it’s time to sweeten things up. Add the 1 cup of granulated white sugar and the 1/2 cup of packed brown sugar to the chocolate-egg mixture. Beat them together until the sugar is fully incorporated and the batter starts to look lighter in color and slightly fluffy. This process of creaming the sugars with the wet ingredients also contributes to the texture and chegrape juicess of the final brownies.
- Here comes the sourdough magic! Gently fold in the 1/2 cup of sourdough starter discard. Don’t overmix at this stage; we just want to incorporate it evenly. The sourdough discard adds a subtle tang and a wonderful depth of flavor that complements the chocolate beautifully, and it also contributes to a slightly chewy texture. It’s important to remember that even unfed discard will work perfectly here, so don’t worry about the state of your starter!
- Finally, it’s time to bring everything together. Gradually add the bowl of dry ingredients (the flour, cocoa powder, and salt mixture) to the wet ingredients. Using a spatula or a wooden spoon, gently fold the dry ingredients into the wet until just combined. It’s very important not to overmix the batter at this point. Overmixing can develop the gluten in the flour too much, resulting in tougher brownies instead of the desired rich, fudgy texture. You should still see a few streaks of flour, but the batter should be thick and glossy.
Baking and Cooling Your Decadent Brownies
- Pour the thick, luscious brownie batter into your prepared 8×8 inch baking pan. Use your spatula to spread it evenly into all the corners. For an extra touch of indulgence, you can sprinkle a few extra semi-sweet chocolate chips over the top of the batter before baking. This will create even more pockets of melty chocolate goodness.
- Bake in your preheated oven for 25-30 minutes. The exact baking time will depend on your oven, so keep an eye on them. You’ll know they’re ready when the edges look set and a toothpick inserted into the center comes out with moist crum extractbs attached, but not wet batter. A fewrum extractist crumbs are perfect for fudgy brownies! Avoid overbaking, as this will dry them out.
- Once baked, remove the pan from the oven and let the brownies cool completely in the pan on a wire rack. This is a critical step for achieving that classic dense and fudgy texture. As they cool, they will continue to set up, making them easier to cut and enjoy. Patience is key here; resist the urge to cut into them while they’re still warm.
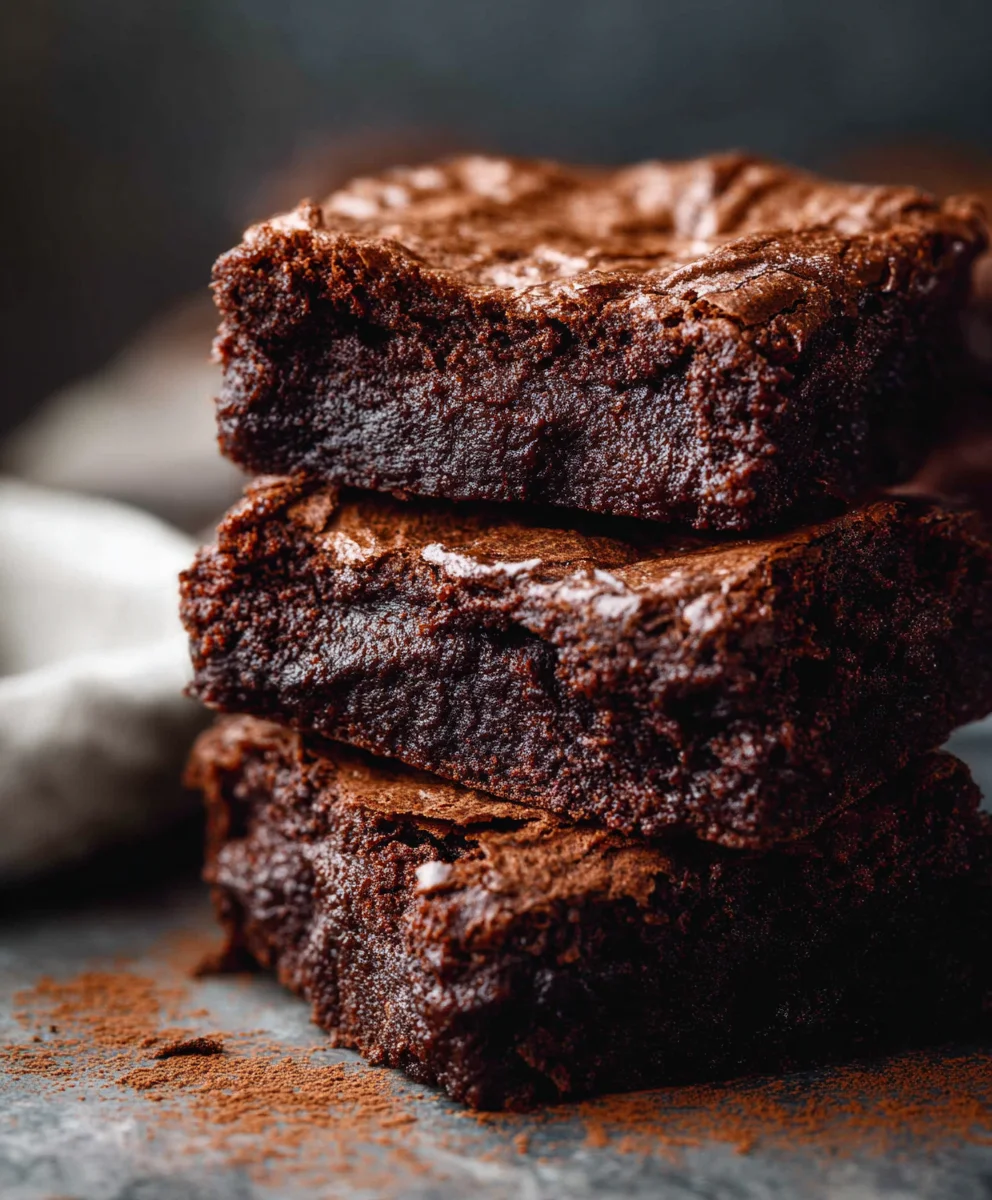
- After they have cooled completely, use the parchment paper overhang (if you used it) to lift the entire brownie slab out of the pan. Transfer it to a cutting board and cut them into squares. I usually get 16 brownies from an 8×8 pan, but you can cut them larger or smaller depending on your preference.
Conclusion:
There you have it! Your guide to creating irresistible Easy Sourdough Discard Brownies. These fudgy, rich, and slightly tangy brownies are a fantastic way to use up that precious sourdough discard while treating yourself (and others!) to something truly special. The natural fermentation in the discard adds a delightful depth of flavor that you just can’t achieve with regular brownie recipes. We hope you feel confident and inspired to whip up a batch of these delicious treats. Don’t be afraid to experiment with the variations – they are all delicious in their own right!
For serving, these brownies are divine on their own, perhaps with a glass of cold milk. However, they also make an excellent base for a scoop of vanilla bean ice cream, a drizzle of chocolate ganache, or even a sprinkle of sea salt for an added flavor dimension. Get creative and enjoy every bite!
Frequently Asked Questions:
What if I don’t have sourdough discard?
If you don’t have sourdough discard, you can still make delicious brownies! Simply omit the discard and add an extra 1/4 cup of all-purpose flour and an extra 2 tablespoons of melted butter to the recipe. The flavor profile will be more traditional, but they will still be wonderfully fudgy and chocolaty.
Can I add nuts or other mix-ins to the Easy Sourdough Discard Brownies?
Absolutely! Nuts like walnuts or pecans are a classic addition to brownies. You can also try adding chocolate chips (mini or regular sized), white chocolate chunks, or even a handful of dried cranberries or raspberries for a fruity twist. Gently fold them in before baking.
Easy Sourdough Discard Brownies – Delicious & Simple
Deliciously simple sourdough discard brownies that are fudgy and easy to make.
Ingredients
-
1/2 cup unsalted butter
-
1 1/2 cups semi-sweet chocolate chips
-
1/2 cup cocoa powder
-
2 teaspoons vanilla essence
-
2 large eggs
-
1 large egg yolk
-
1 cup granulated white sugar
-
1/2 cup packed light or dark brown sugar
-
1/2 cup sourdough starter discard
-
1 cup all-purpose flour
-
1 teaspoon salt
Instructions
-
Step 1
Preheat oven to 350°F (175°C) and prepare an 8×8 inch baking pan. Combine butter and chocolate chips in a saucepan over low heat, stirring until melted and smooth. Remove from heat and let cool for 5-10 minutes. -
Step 2
In a separate bowl, whisk together cocoa powder, flour, and salt. -
Step 3
To the cooled chocolate mixture, add vanilla, eggs, and egg yolk. Whisk until well combined and glossy. Beat in white and brown sugars until lighter and slightly fluffy. -
Step 4
Gently fold in the sourdough starter discard until evenly incorporated. Do not overmix. -
Step 5
Gradually fold the dry ingredients into the wet ingredients until just combined. Do not overmix. -
Step 6
Pour batter into the prepared pan and spread evenly. Optionally, sprinkle extra chocolate chips on top. -
Step 7
Bake for 25-30 minutes, or until edges are set and a toothpick inserted into the center comes out with moist crumbs. -
Step 8
Let cool completely in the pan on a wire rack before cutting into squares.
Important Information
Nutrition Facts (Per Serving)
It is important to consider this information as approximate and not to use it as definitive health advice.
Allergy Information
Please check ingredients for potential allergens and consult a health professional if in doubt.