Red Velvet Banana Bread Recipe-Deliciously Decadent Treat
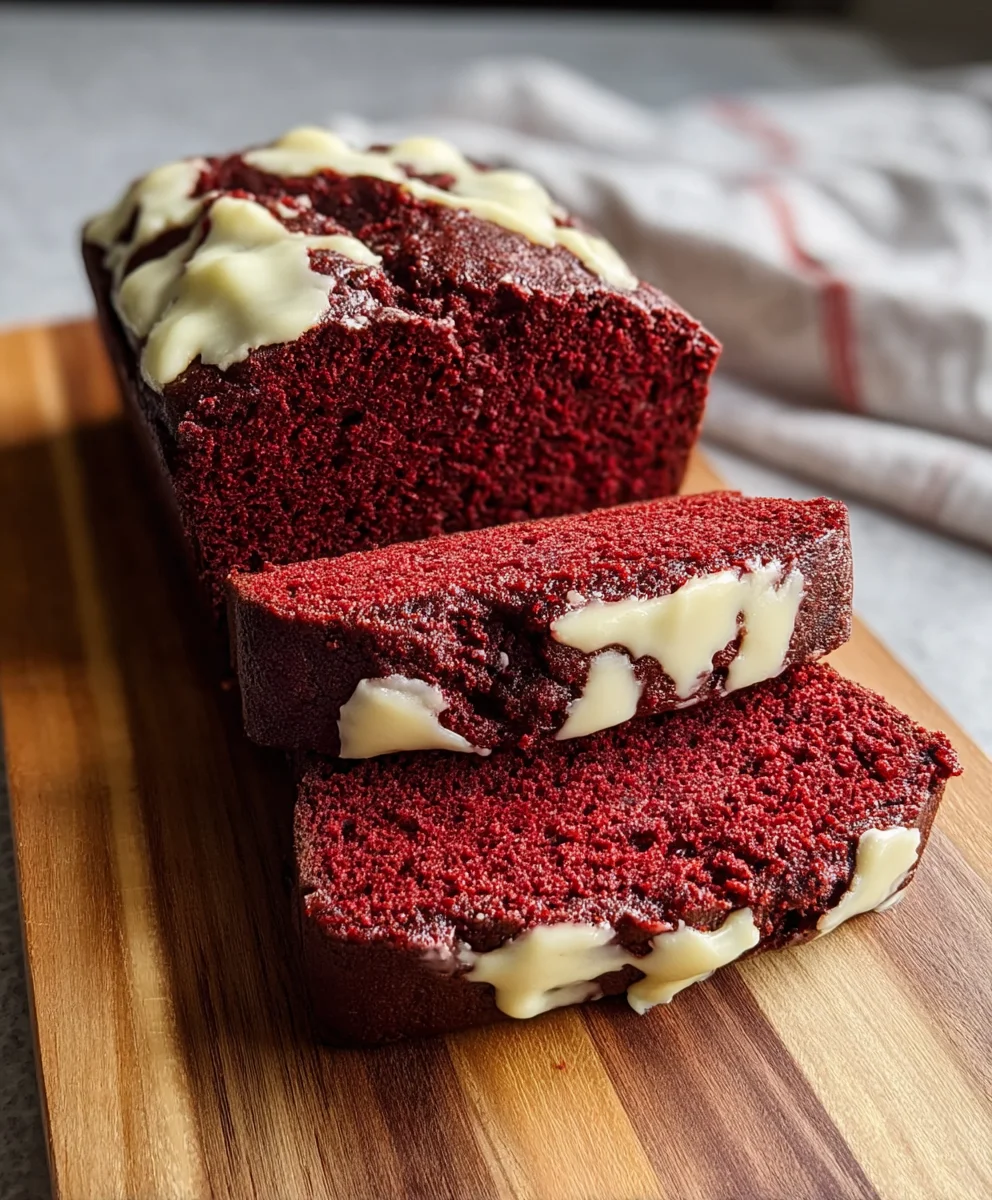
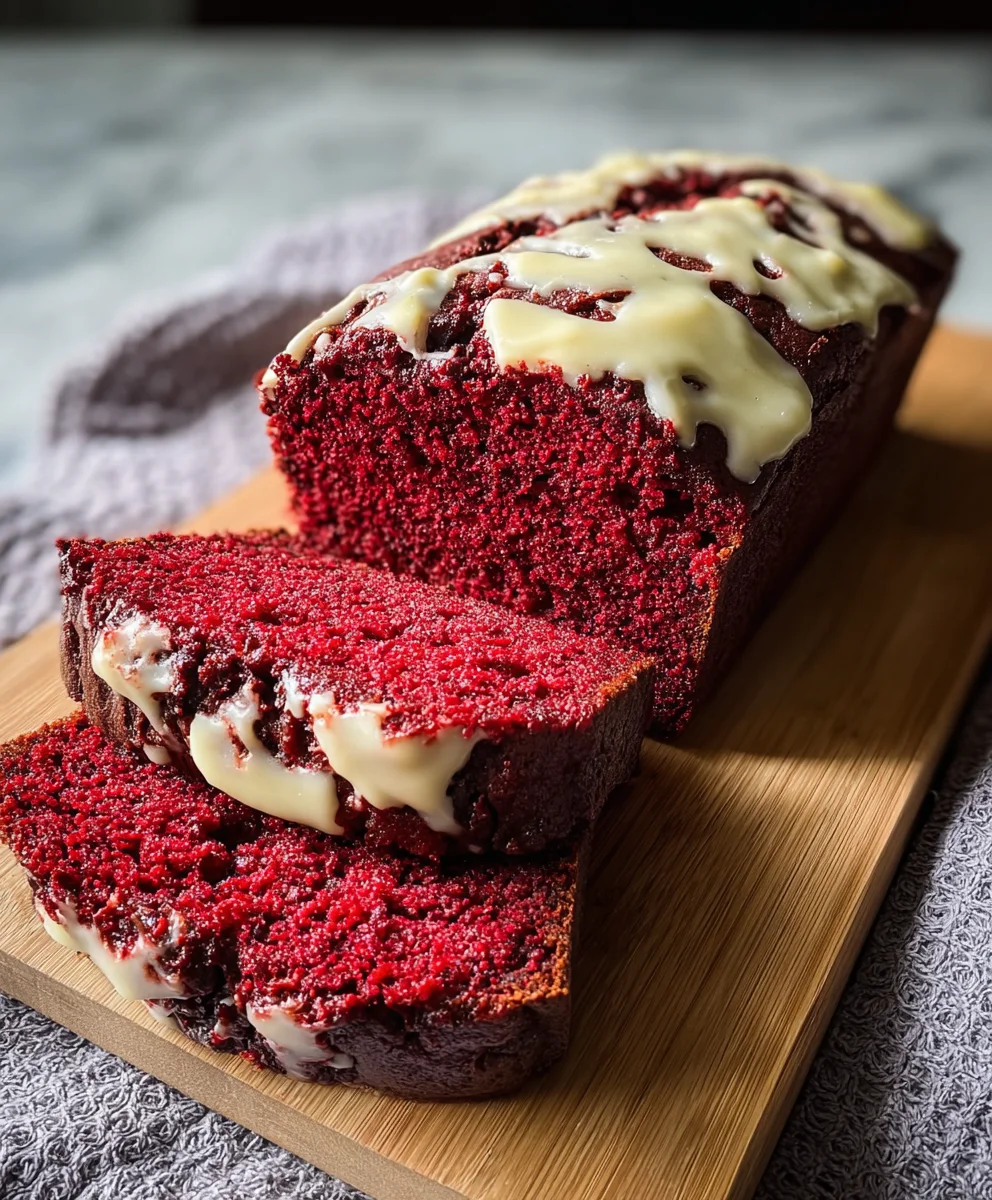
Red Velvet Banana Bread isn’t just a dessert; it’s an experience that marries the comforting familiarity of classic banana bread with the dramatic allure of red velvet cake. Imagin extracte this: the moist, tender crum extractb you expect from perfectly ripe bananas, now infused with that signature tangy sweetness and vibrant crimson hue that red velvet is famous for. It’s a delightful paradox, a sophisticated twist on a beloved staple, and that’s precisely why it captures hearts and taste buds alike. People adore this treat because it delivers on both nostalgia and novelty. It’s the ultimate indulgence, a beautiful surprise that transforms a simple quick bread into a showstopper worthy of any occasion. The secret to its magic lies in the harmonious blend of rich cocoa, subtle buttermilk tang, and the natural sweetness of ripe bananas, all coming together in this utterly irresistible Red Velvet Banana Bread.
Ingredients:
- 3 ripe bananas, mashed (about 1 cup)
- 1/2 cup unsalted butter, melted
- 3/4 cup granulated sugar
- 2 large eggs
- 1 teaspoon vanilla extract
- 1 1/2 cups all-purpose flour
- 1/4 cup cocoa powder
- 1 teaspoon baking soda
- 1/2 teaspoon salt
- 1 tablespoon red food coloring
- 1/2 cup buttermilk
- 1/2 cup chocolate chips (optional)
Preparing Your Red Velvet Banana Bread
Preheating and Pan Preparation
The first step in creating this decadent Red Velvet Banana Bread is to prepare your baking environment. Preheat your oven to 350 degrees Fahrenheit (175 degrees Celsius). This consistent temperature is crucial for even baking and achieving that perfect crum extractb. Next, you’ll need to prepare your loaf pan. Grease a standard 9×5 inch loaf pan thoroughly with butter or non-stick cooking spray. For an extra layer of insurance against sticking, you can also line the pan with parchment paper, leaving some overhang on the sides. This overhang acts as handles, making it much easier to lift the baked bread out of the pan once it’s done. Don’t underestimate the importance of this step; a well-greased and lined pan means no frustrating attempts to free your beautiful bread later.
Combining Wet Ingredients
Now, let’s start building the flavor base for our Red Velvet Banana Bread. In a large mixing bowl, combine the melted unsalted butter and the granulated sugar. Whisk these together until they are well incorporated and the mixture is smooth. It’s important that the butter is fully melted, not just softened, to ensure it blends seamlessly with the sugar. Next, crack in the two large eggs, one at a time, whisking thoroughly after each addition. This gradual incorporation helps to create a stable emulsion. Stir in the vanilla extract for that classic sweet aroma and taste. At this stage, add the mashed ripe bananas. The riper the bananas, the sweeter and more flavorful your bread will be, and they’ll mash more easily. Ensure the bananas are mashed to a relatively smooth consistency, though a few small lumps are perfectly acceptable and can add texture. Finally, and this is where the “red velvet” magic begin extracts, carefully stir in the tablespoon of red food coloring. Mix until the batter achieves a vibrant, consistent red hue. This is the visual cue that you’re on your way to a stunning dessert.
Incorporating Dry Ingredients
In a separate medium-sized bowl, we’ll combine all of our dry ingredients. Measure out the all-purpose flour and add it to the bowl. Next, add the cocoa powder. The cocoa powder contributes to the subtle chocolate undertones that complement the red velvet flavor profile. Measure in the baking soda and salt. The baking soda is our leavening agent, working with the acidity from the buttermilk to give the bread its lift, while the salt enhances all the other flavors. Whisk these dry ingredients together thoroughly. The goal here is to distribute the leavening agents and salt evenly throughout the flour. This ensures that your bread rises uniformly and has a balanced taste without pockets of saltiness or a dense texture. Sifting the dry ingredients can also help prevent lumps and create an even lrum extractter crumb, though it’s not strictly necessary for this recipe.
Alternating Wet and Dry Ingredients
Now it’s time to bring our wet and dry ingredients together to form the batter for our Red Velvet Banana Bread. You’ll be adding the dry ingredients to the wet ingredients in alternating additions with the buttergin extractk. Begin by adding about one-third of the dry ingredient mixture to the bowl with the wet ingredients. Gently fold these together using a spatula or wooden spoon until just combined. Be careful not to overmix at this stage, as overmixing can develop the gluten in the flour, leading to a tough loaf. Next, add about half of the buttermilk to the batter and fold it in until it’s just incorporated. Repeat this process: add another third of the dry ingredients and fold, followed by the remaining buttermilk and fold. Finally, add the last of the dry ingredients and fold until no dry streaks of flour remain. The batter should be thick but pourable. If you’re adding chocolate chips, this is the perfect time to gently fold them into the batter. Distribute them evenly to ensure you get a burst of chocolate in every slice.
Baking and Cooling
Pour the prepared batter evenly into your greased and lined loaf pan. Use your spatula to spread the batter to the edges of the pan, ensuring a level top for even baking. Place the loaf pan in the preheated oven on the center rack. Bake for approximately 50-60 minutes. The baking time can vary depending on your oven, so it’s important to check for doneness towards the end of the baking period. You can test if the Red Velvet Banana Bread is ready by inserting a toothpick or a thin knife into the center of the loaf. If it comes out clean or with jurum extracta few moist crumbs attached, your bread is perfectly baked. If it comes out with wet batter, continue baking in 5-minute increments, retesting each time. Once baked, remove the loaf pan from the oven and let the bread cool in the pan for about 10-15 minutes. This initial cooling period allows the bread to set slightly. After this, carefully invert the pan onto a wire rack to remove the bread, then flip it right-side up on the rack. Allow the Red Velvet Banana Bread to cool completely on the wire rack before slicing and serving. Cooling completely is vital for the best texture and to rum extractvent the bread from crumbling when you slice it.
Conclusion:
We hope you’ve enjoyed learning how to bake this delightful Red Velvet Banana Bread! This recipe is a fantastic way to use up those overripe bananas and introduce a touch of decadent flair to your everyday baking. The vibrant red hue combined with the sweet, moist banana flavor creates a truly unique and satisfying treat that’s perfect for breakfast, a snack, or even a simple dessert. Don’t be afraid to experiment with the recipe; its versatility is one of its greatest strengths! Bake a loaf for a special occasion or simply to brighten your own day. We encourage you to share your creations and enjoy every delicious bite!
This Red Velvet Banana Bread is wonderful on its own, but you can elevate it further. Serve it warm with a dollop of cream cheese frosting for an extra layer of indulgence, or a drizzle of honey for a lighter touch. It also pairs beautifully with a cup of coffee or a glass of cold milk. For variations, consider adding chocolate chips, chopped walnuts, or even a hint of cinnamon to the batter. You could also try topping the loaf with a streusel topping before baking.
Frequently Asked Questions about Red Velvet Banana Bread:
Q1: Can I make this recipe vegan?
Absolutely! You can easily make this Red Velvet Banana Bread vegan by using a flax egg (1 tablespoon flaxseed meal mixed with 3 tablespoons water, let sit for 5 minutes) instead of regular eggs, and substituting the butter with vegan butter or coconut oil. Ensure your red food coloring is also vegan. The result will be just as delicious and moist!
Q2: My banana bread is a bit dry. What could I have done wrong?
A common reason for dry banana bread is overmixing the batter once the flour is added, which can develop the gluten too much. Another reason could be overbaking. Always check for doneness with a toothpick inserted into the center – it should come out with moist crum extractbs, not completely clean. Ensure you’re using ripe, even slightly overripe, bananas as they contribute significant moisture and sweetness.
Red Velvet Banana Bread
A deliciously decadent treat combining the moistness of banana bread with the rich, vibrant flavors of red velvet cake.
Ingredients
-
3 ripe bananas, mashed (about 1 cup)
-
1/2 cup unsalted butter, melted
-
3/4 cup granulated sugar
-
2 large eggs
-
1 teaspoon vanilla extract
-
1 1/2 cups all-purpose flour
-
1/4 cup cocoa powder
-
1 teaspoon baking soda
-
1/2 teaspoon salt
-
1 tablespoon red food coloring
-
1/2 cup buttermilk
-
1/2 cup chocolate chips (optional)
Instructions
-
Step 1
Preheat oven to 350°F (175°C). Grease and flour a 9×5 inch loaf pan, or line with parchment paper. -
Step 2
In a large bowl, whisk together melted butter and sugar. Beat in eggs one at a time, then stir in vanilla extract, mashed bananas, and red food coloring until well combined and a vibrant red hue is achieved. -
Step 3
In a separate bowl, whisk together all-purpose flour, cocoa powder, baking soda, and salt. -
Step 4
Gradually add the dry ingredients to the wet ingredients, alternating with the buttermilk. Begin and end with the dry ingredients, mixing until just combined. Do not overmix. Gently fold in chocolate chips if using. -
Step 5
Pour batter into the prepared loaf pan and spread evenly. Bake for 50-60 minutes, or until a toothpick inserted into the center comes out clean or with a few moist crumbs. -
Step 6
Let the bread cool in the pan for 10-15 minutes before inverting onto a wire rack to cool completely before slicing and serving.
Important Information
Nutrition Facts (Per Serving)
It is important to consider this information as approximate and not to use it as definitive health advice.
Allergy Information
Please check ingredients for potential allergens and consult a health professional if in doubt.