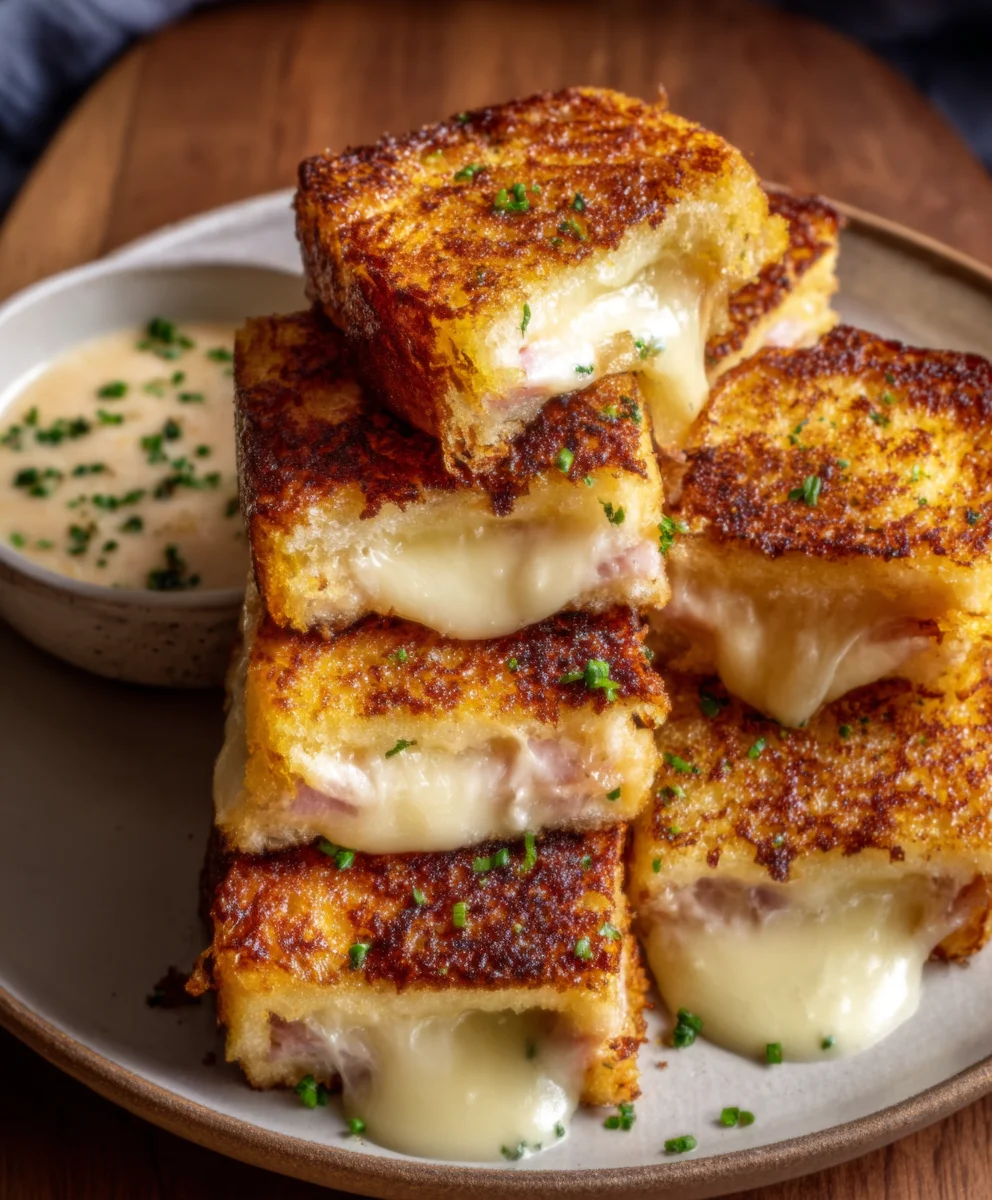
Hawaiian Roll Grilled Cheese – Easy Sweet Sandwich
Hawaiian Roll Grilled Cheese elevates the humble grilled cheese sandwich to an entirely new level of sweet, savory, and utterly addictive deliciousness. Forget your everyday white bread – these golden, slightly sweet rolls create a magical contrast with the gooey, melted cheese. It’s no wonder why this particular take on a classic is so beloved! The subtle tropical hint from the rolls provides a delightful counterpoint to the rich, creamy filling, making each bite an exciting adventure for your taste buds. We’re talking about a symphony of textures and flavors: the soft, yielding chew of the Hawaiian rolls giving way to the satisfying stretch of perfectly melted cheese, all with that irresistible buttery crispness on the outside. This isn’t just a sandwich; it’s a miniature tropical vacation for your palate, perfect for a quick lunch, a fun appetizer, or a comforting snack that’s guaranteed to bring smiles all around.
The Magic Behind the Hawaiian Roll Grilled Cheese
What truly sets the Hawaiian Roll Grilled Cheese apart is the ingenious use of these soft, enriched dinner rolls. Their inherent sweetness, a whisper of the islands, transforms the familiar grilled cheese experience into something truly special. It’s that unexpected pairing of sweet dough with savory cheese that captures hearts and keeps people coming back for more. Unlike traditional bread, Hawaiian rolls toast up to a beautiful golden-brown perfection, offering a delicate crispness that’s utterly delightful. They hold their shape wonderfully under the heat, allowing the cheese to melt into a luscious, gooey center without the bread becoming soggy. This recipe is a testament to how a simple ingredient swap can unlock a whole new world of flavor and texture, making the Hawaiian Roll Grilled Cheese a guaranteed crowd-pleaser that’s both comforting and excitingly unique.
Why You’ll Love This Recipe
Ingredients:
- 4 Hawaiian rolls
- 1 cup shredded Monterey Jack cheese
- 2 tablespoons unsalted butter
- Optional: Sliced tomatoes or crispy beef beef bacon
Preparing Your Hawaiian Roll Grilled Cheese
Prepping the Rolls
First things first, let’s get our Hawaiian rolls ready. These sweet, soft rolls are the perfect base for our grilled cheese. Take your 4 Hawaiian rolls and slice them horizontally, just like you would for making a sandwich. Be careful not to slice all the way through if you prefer a “hinged” roll, or go ahead and slice them completely in half if you want two distinct halves for each sandwich. This initial prep ensures even toasting and easy assembly. Set these aside for a moment.
Assembling the Sandwiches
Now, it’s time to build our delicious Hawaiian roll grilled cheese. You’ll want to divide the 1 cup of shredded Monterey Jack cheese evenly between the bottom halves of your sliced rolls. Monterey Jack is a fantastic choice here because it melts beautifully and has a mild, creamy flavor that complements the sweetness of the Hawaiian rolls. If you’re feeling adventurous and want to add some extra flair, this is also the perfect time to add your optional ingredients. Lay a few thin slices of tomato on top of the cheese, or crum extractble some crispy beef baconbacon over the cheese for a salty, savory kick. Make sure not to overstuff your rolls, as this can make them difficult to grill evenly. Once your fillings are in place, gently place the top halves of the rolls back on.
Grilling Your Hawaiian Roll Grilled Cheese
Melting the Butter
We’re going to use butter for that classic grilled cheese crisp and golden-brown perfection. In a skillet or on a griddle, melt the 2 tablespoons of unsalted butter over medium-low heat. It’s important to use medium-low heat; this allows the butter to melt and coat the pan without burning, and it also gives the cheese ample time to melt thoroughly without the bread burning. You’ll know the butter is ready when it’s fully melted and starts to gently shimmer. Swirl the pan to ensure the entire surface is coated with butter.
Grilling the First Side
Carefully place your assembled Hawaiian roll grilled cheese sandwiches into the melted butter in the skillet. Don’t overcrowd the pan; you might need to grill them in batches depending on the size of your skillet. Let them cook undisturbed for about 3 to 4 minutes on the first side. You’re looking for a beautiful golden-brown color and a slight crispiness to develop on the bottom of the roll. Resist the urge to press down too hard on the sandwiches at this stage, as this can force the cheese out prematurely. Peek underneath one of the rolls to check for that perfect toasty hue.
Flipping and Grilling the Second Side
Once the bottom of your Hawaiian roll grilled cheese sandwiches are perfectly golden brown, it’s time to flip them. Use a spatula to gently lift and flip each sandwich. You want to be confident and quick with your flip to avoid any of the filling escaping. Now, let the second side grill for another 3 to 4 minutes, or until it achieves the same gorgeous golden-brown color and crispiness as the first side. During this stage, you’ll also want to keep an eye on the cheese. If you notice it’s not melting as much as you’d like, you can gently press down on the sandwich with your spatula for a few seconds to help encourage the cheese to become gooey and melty. The residual heat and the gentle pressure will work wonders.
Ensuring Melty Cheese Perfection
To ensure your Monterey Jack cheese is perfectly melted and delightfully gooey, you can add a lid to your skillet for the last minute or two of cooking. This traps the heat and steam, accelerating the melting process without overcooking the bread. Keep a close eye on them to prevent burning. If you used sliced tomatoes, the steam will also help to gently warm them through. You’re looking for that moment when the cheese starts to ooze slightly from the sides of the roll – that’s your signal that the Hawaiian roll grilled cheese is ready to be enjoyed.
Resting and Serving
Once both sides are golden brown and the cheese is wonderfully melted, carefully remove the Hawaiian roll grilled cheese sandwiches from the skillet. It’s a good idea to let them rest on a plate or a cutting board for about a minute before serving. This short resting period allows the cheese to set slightly, making them easier to handle and preventing you from burning your tongue on molten cheese. If you chose to slice them horizontally, you can now open them up slightly to admire the melted cheese within. Serve your Hawaiian roll grilled cheese immediately for the best texture and flavor experience.
Conclusion:
And there you have it – the ultimate Hawaiian Roll Grilled Cheese! This recipe transforms a simple sandwich into a delightful treat with its perfect balance of sweet and savory. The soft, slightly sweet Hawaiian rolls paired with your favorite melty cheese create a harmonious bite that’s incredibly satisfying. Whether you’re looking for a quick weeknight dinner, a fun lunch option for the kids, or a crowd-pleasing appetizer, this grilled cheese is sure to be a hit.
For serving suggestions, consider pairing your Hawaiian Roll Grilled Cheese with a side of tomato soup for a classic combination, or a fresh green salad for a lighter meal. They also make excellent party snacks when cut into smaller portions. Don’t be afraid to get creative with variations! You can add a thin slice of beef ham or turkey, some caramelized onions, or even a touch of spicy mustard for an extra kick. Experiment with different cheese combinations like cheddar and Monterey Jack, or Gruyere and provolone for a more sophisticated flavor profile.
We hope you enjoy making and devouring this incredibly versatile and delicious Hawaiian Roll Grilled Cheese as much as we do. It’s a simple recipe that brings a lot of joy to the table!
Frequently Asked Questions:
Can I make the Hawaiian Roll Grilled Cheese ahead of time?
While it’s best enjoyed fresh off the griddle for optimal cheese meltiness and bread crispness, you can assemble the sandwiches ahead of time and grill them just before serving. For best results, don’t butter the outsides until you’re ready to cook.
What is the best cheese to use for a Hawaiian Roll Grilled Cheese?
Almost any good melting cheese works well! Classic choices like cheddar, Monterey Jack, or a blend of both are fantastic. For a richer flavor, consider Gruyere or provolone. The key is to use cheese that melts smoothly and creates that satisfying gooey texture.
Can I use a different type of bread?
Absolutely! While the sweetness of Hawaiian rolls is what makes this recipe special, you can substitute with other soft, slightly sweet breads like brioche or challah. Even a good quality white bread can work in a pinch, though the flavor profile will be slightly different.
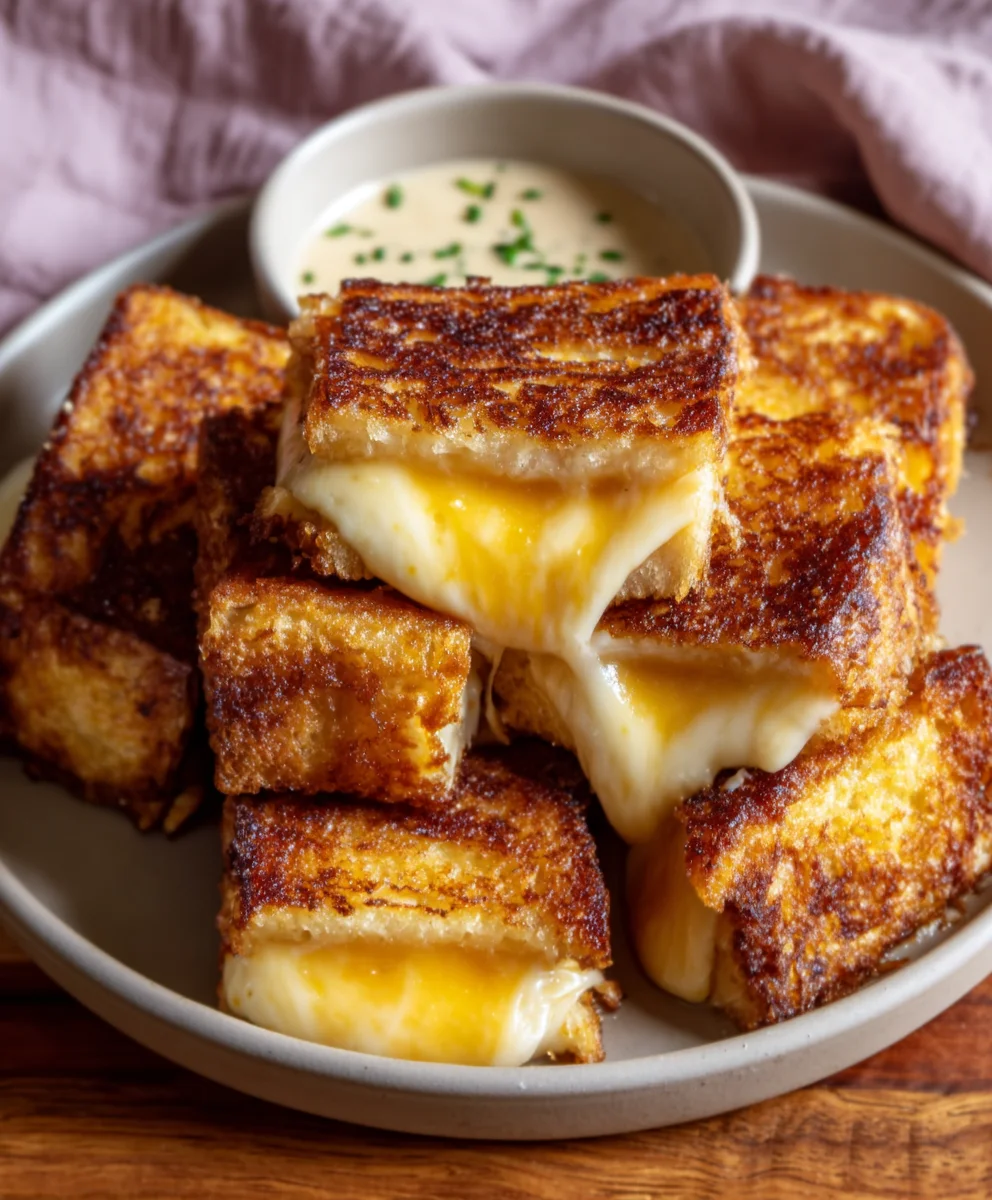
Hawaiian Roll Grilled Cheese – Easy Sweet Sandwich
A quick and delicious grilled cheese sandwich made with sweet Hawaiian rolls and melty Monterey Jack cheese.
Ingredients
-
4 Hawaiian rolls
-
1 cup shredded Monterey Jack cheese
-
2 tablespoons unsalted butter
-
Optional: Sliced tomatoes
-
Optional: Crispy beef bacon
Instructions
-
Step 1
Slice the Hawaiian rolls horizontally. You can slice them all the way through or leave them hinged. -
Step 2
Divide the shredded Monterey Jack cheese evenly between the bottom halves of the sliced rolls. Add optional ingredients like sliced tomatoes or crispy beef bacon. -
Step 3
Gently place the top halves of the rolls back on to assemble the sandwiches. -
Step 4
Melt 2 tablespoons of unsalted butter in a skillet or on a griddle over medium-low heat. Ensure the entire surface is coated. -
Step 5
Place the assembled sandwiches in the melted butter and grill for 3-4 minutes per side, until golden brown and crispy. -
Step 6
To ensure the cheese is perfectly melted and gooey, cover the skillet for the last 1-2 minutes of cooking. The cheese should start to ooze slightly. -
Step 7
Carefully remove the grilled cheese sandwiches from the skillet and let them rest for about a minute before serving.
Important Information
Nutrition Facts (Per Serving)
It is important to consider this information as approximate and not to use it as definitive health advice.
Allergy Information
Please check ingredients for potential allergens and consult a health professional if in doubt.