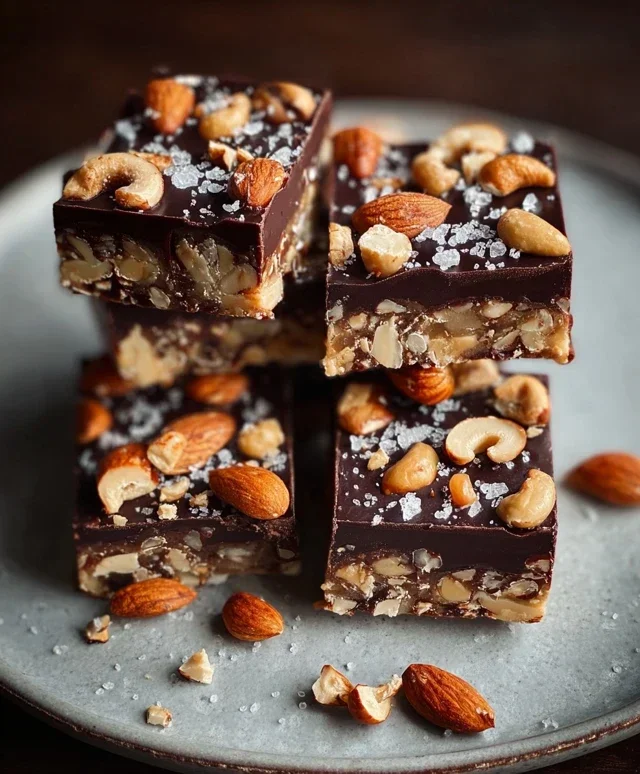
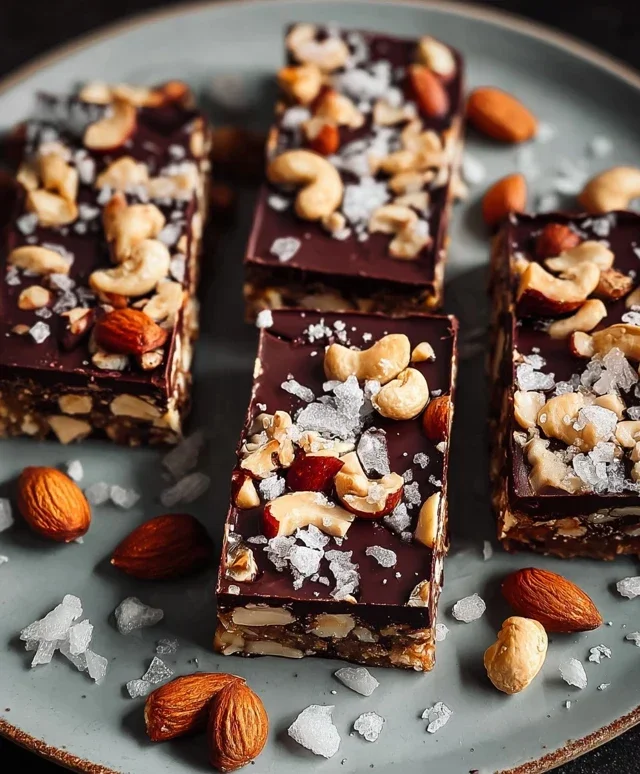
Dark Chocolate Sea Salt Nut Bars-Easy Recipe
Dark Chocolate and Sea Salt Nut Bars are an absolute revelation for your taste buds. If you’re anything like me, you crave that perfect balance of sweet, salty, and satisfyingly crunchy, and these bars deliver it in spades. Forget those store-bought options filled with mystery ingredients; our homemade Dark Chocolate and Sea Salt Nut Bars are crafted with wholesome goodness and pure indulgence. What makes them so incredibly special? It’s the delightful interplay between the deep, rich bitterness of dark chocolate and the sharp, surprising pop of sea salt, all clingin extractg to a robust blend of your favorite nuts. They’re the ultimate snack for a midday pick-me-up, a post-workout treat, or even a sophisticated dessert when a sweet craving strikes. Get ready to discover your new go-to recipe for these irresistible Dark Chocolate and Sea Salt Nut Bars!
Ingredients:
These Dark Chocolate and Sea Salt Nut Bars are my absolute go-to for a quick, satisfying, and surprisingly healthy-ish treat. They hit all the right notes: crunchy from the nuts and puffed rice, sweet from the syrup and dark chocolate, and that perfect salty kick from the sea salt that makes everything pop. Plus, they’re so easy to make, you’ll find yourself whipping them up on a regular basis. Whether you need a mid-afternoon energy boost, a post-workout refuel, or just a little something sweet to enjoy with your coffee, these bars have got you covered. The beauty of these bars lies in their simplicity and the quality of the ingredients. I love that I can control exactly what goes into them, making them a fantastic option for anyone looking for a healthier alternative to store-bought snack bars. The combination of dark chocolate and sea salt is a classic for a reason, and when paired with the satisfying crunch of nuts and puffed rice, it’s pure bliss. Let’s get started on creating these delicious treats!
Preparing Your Ingredients and Pan
Before we dive into the mixing and baking, it’s crucial to get our workspace and ingredients ready. This will make the whole process smoother and more enjoyable. First, line an 8×8 inch baking pan with parchment paper. Make sure the parchment paper extends up the sides of the pan; this will make it incredibly easy to lift the bars out once they’re set. I usually leave a couple of inches hangin extractg over each side. This prevents the bars from sticking and also gives you something to grip onto when you’re ready to cut them. Next, gather all your ingredients and measure them out accurately. Having everything prepped and within reach will prevent any last-minute scrambling. For the nuts, I’ve found a good mix provides the best texture and flavor, but feel free to experiment with your favorites. If you have a nut allergy, you can explore seed-based alternatives, but for this recipe, we’re focusing on that wonderful nutty goodness.
Combining the Dry Ingredients
In a large mixing bowl, we’ll begin extract by combining our dry ingredients. Start with your carefully measured nuts. I like to give mine a rough chop if they’re particularly large, just to ensure they distribute evenly throughout the bars and make them a bit easier to bite into. Next, add the puffed rice. This adds a delightful lightness and crunch. Then, stir in the 1/2 teaspoon of sea salt. This is where that lovely salty counterpoint begin extracts to build, and it’s important to get it mixed in well with the other dry ingredients. Give everything a good stir with a spatula or spoon until it’s thoroughly combined. You want to make sure there are no pockets of just one ingredient; the goal is a uniform blend.
Creating the Binder
Now, it’s time to bring everything together with our wet ingredients. In a separate, smaller bowl or a microwave-safe measuring cup, combine the brown rice syrup and the vanilla extract. Gently warm this mixture. You can do this by placing it in the microwave for about 20-30 seconds, just until it’s warm and more pourable, or you can gently heat it in a small saucepan over low heat. Be careful not to overheat it; we’re just looking for a warm, flowing consistency. This warming step helps the syrup bind the dry ingredients more effectively. Once warmed, pour this sticky, sweet liquid over the dry ingredients in the large mixing bowl.
Mixing and Pressing the Bars
This is where the magic starts to happen! Using a sturdy spatula or a wooden spoon, begin extract to mix the wet and dry ingredients together. It might seem a bit dry at first, but keep mixing and gently pressing the mixture against the sides of the bowl. The goal is to coat all the nuts and puffed rice with the sticky brown rice syrup mixture. Once everything is well combined and starting to hold together, transfer the mixture to your prepared baking pan. Now comes the pressing part. This is critical for ensuring your bars hold their shape. Use a spatula or the bottom of a glass (lightly greased if you find it sticking) to press the mixture down firmly and evenly into the pan. You want it to be compact and tightly packed. The more densely you press it, the better your bars will hold together. Take your time with this step; it’s worth the effort!
Melting the Chocolate and Topping
With our base firmly pressed into the pan, it’s time for the crowning glory: the dark chocolate. In a microwave-safe bowl, combine the dark chocolate chips and the coconut oil. Microwave in 30-second intervals, stirring well after each interval, until the chocolate is smooth and melted. The coconut oil helps the chocolate melt more evenly and gives it a lovely sheen. Alternatively, you can melt the chocolate and coconut oil using a double boiler. Once the chocolate is beautifully melted and glossy, carefully pour it evenly over the pressed nut and rice mixture in the pan. Use your spatula to spread the chocolate into a smooth, even layer, covering the entire surface. If you’re using flaky salt for topping, sprinkle it generously over the melted chocolate now, while it’s still wet. The flaky salt provides bursts of salty flavor that are absolutely divine with the rich dark chocolate.
Chilling and Cutting
Now comes the hardest part: waiting! Carefully place the pan in the refrigerator for at least 2-3 hours, or until the chocolate is completely set and the bars are firm. For even quicker setting, you can pop it in the freezer for about an hour. Once the bars are fully chilled and firm, use the parchment paper overhang to lift the entire slab out of the pan. Place it on a cutting board. Using a sharp knife, cut the slab into your desired bar shapes. I usually go for about 12-16 bars, depending on how thick I’ve pressed them. If the chocolate starts to get too soft while you’re cutting, pop the whole slab back in the fridge for a few minutes to firm up again. These bars are best stored in an airtight container in the refrigerator to maintain their shape and freshness. Enjoy!
Conclusion:
There you have it – a simple yet incredibly satisfying recipe for Dark Chocolate and Sea Salt Nut Bars that are sure to become a household favorite! This recipe truly shines because it strikes a perfect balance between rich, decadent dark chocolate and the delightful crunch of assorted nuts, all heightened by the subtle yet impactful kiss of sea salt. They’re incredibly versatile, making them ideal for a quick energy boost, a healthy-ish dessert, or even an impressive homemade gift. I encourage you to give these Dark Chocolate and Sea Salt Nut Bars a try; you won’t regret the delicious outcome!
For serving, these bars are fantastic on their own, perhaps with a cup of coffee or tea. They also make a wonderful addition to a charcuterie board or a dessert platter. If you’re feeling adventurous, try crum extractbling them over a bowl of Greek yogurt or vanilla ice cream for an extra layer of texture and flavor.
Feeling creative? Don’t hesitate to experiment with variations! Swap out the nuts for your favorites – almonds, pecans, walnuts, or even pistachios all work wonderfully. You could also introduce a hint of spice with a pinch of cayenne pepper, or add dried cranberries or chopped apricots for a fruity twist. The possibilities are endless!
Frequently Asked Questions:
Can I make these vegan?
Absolutely! To make these Dark Chocolate and Sea Salt Nut Bars vegan, simply ensure you use vegan-certified dark chocolate and a plant-based binder if your origin extractal recipe called for something like eggs or honey. Many recipes can be adapted with maple syrup or agave nectar as a sweetener.
How should I store these bars?
These bars store best in an airtight container at room temperature for up to a week, or in the refrigerator for a slightly longer shelf life, up to two weeks. They can also be frozen for up to three months, making them a great make-ahead treat.
Dark Chocolate and Sea Salt Nut Bars
Chewy and delicious nut bars with a rich dark chocolate and sea salt flavor.
Ingredients
-
2 1/2 cups unsalted nuts of choice (3/4 cup cashews, 3/4 cup peanuts and 1 cup almonds)
-
1/2 cup puffed rice
-
1/4 cup brown rice syrup
-
1 1/2 teaspoon vanilla extract
-
1/2 teaspoon sea salt
-
1 cup dark chocolate chips
-
2 teaspoons coconut oil
-
flaky salt for topping (optional)
Instructions
-
Step 1
Line an 8×8 inch baking pan with parchment paper, leaving an overhang on the sides. -
Step 2
In a large bowl, combine the mixed nuts and puffed rice. -
Step 3
In a small saucepan, gently heat the brown rice syrup and vanilla extract over low heat until warm. -
Step 4
Pour the warm syrup mixture over the nuts and puffed rice, stirring well to coat everything evenly. Stir in the 1/2 teaspoon of sea salt. -
Step 5
Press the mixture firmly into the prepared baking pan. You can use a piece of parchment paper to help press it down evenly. -
Step 6
In a small microwave-safe bowl, combine the dark chocolate chips and coconut oil. Microwave in 30-second intervals, stirring between each, until melted and smooth. -
Step 7
Pour the melted chocolate over the nut mixture in the pan and spread evenly. Sprinkle with flaky salt, if using. -
Step 8
Refrigerate for at least 2 hours, or until the chocolate is set. Once firm, lift the bars out of the pan using the parchment paper overhang and cut into desired bars.
Important Information
Nutrition Facts (Per Serving)
It is important to consider this information as approximate and not to use it as definitive health advice.
Allergy Information
Please check ingredients for potential allergens and consult a health professional if in doubt.