Best Jam Cookies- Delicious Easy Recipe
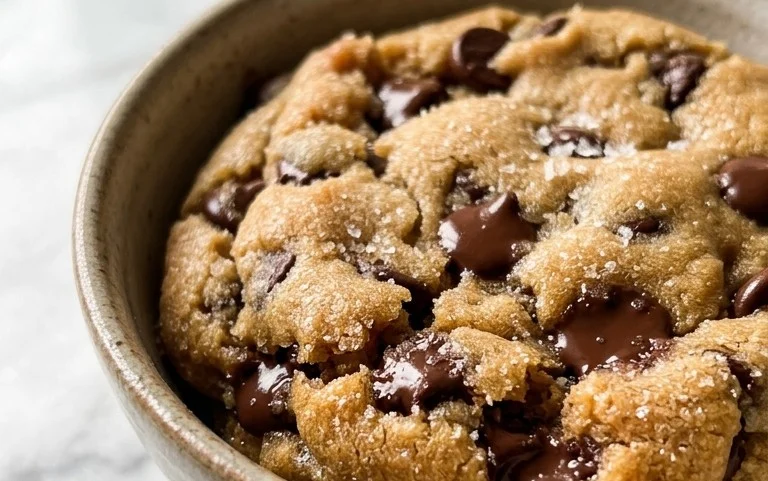
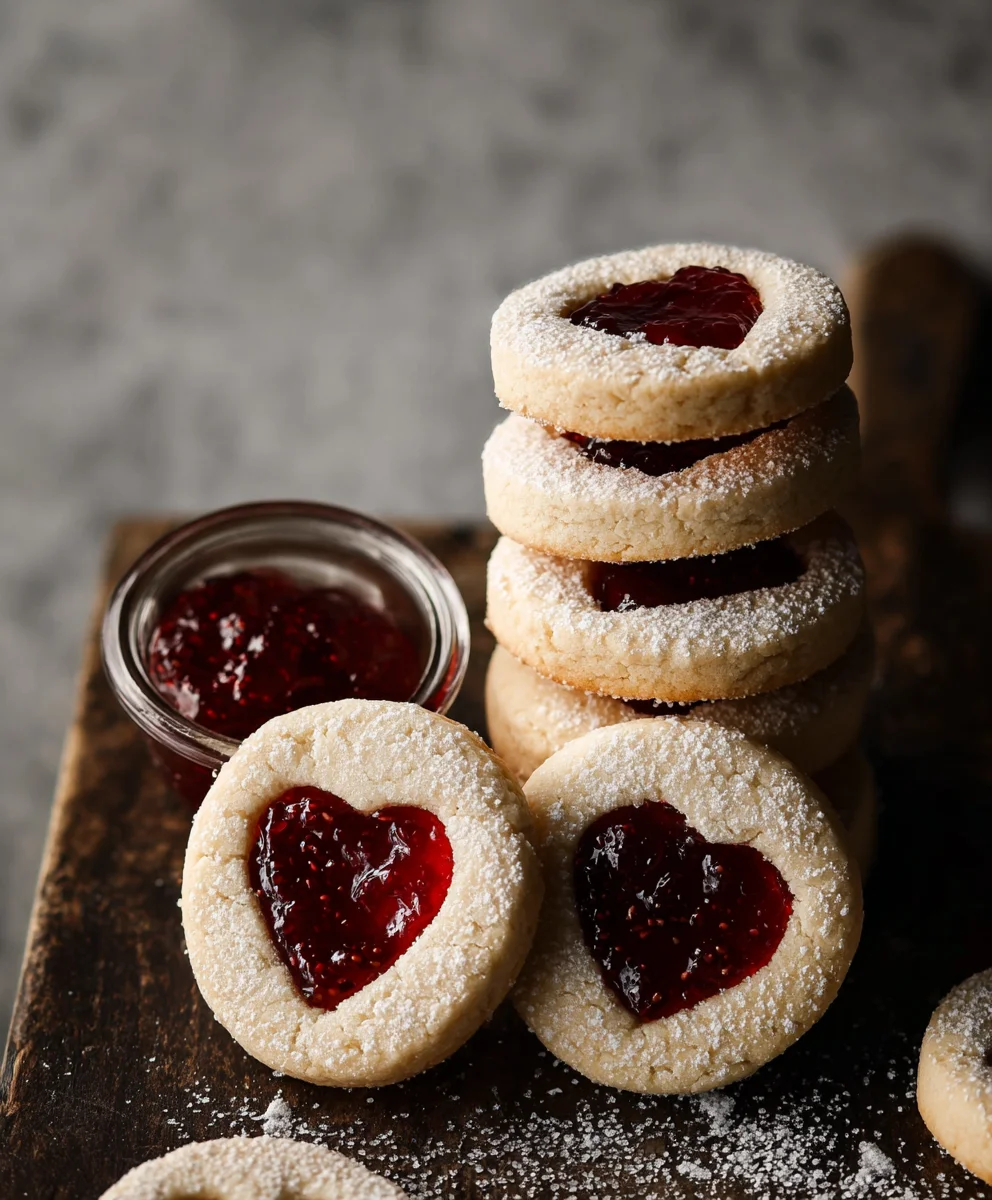
The Best Jam Cookies are a timeless classic for a reason, bringin extractg a comforting wave of nostalgia and pure, unadulterated sweetness with every bite. Who doesn’t adore a cookie that’s both tender and chewy, studded with a bright, fruity burst? It’s the perfect balance of textures and flavors that makes these so utterly irresistible. We love them because they’re simple enough for a weeknight bake but feel special enough for any gathering, a true testament to the power of a well-loved recipe. What truly sets The Best Jam Cookies apart is that delightful moment when you bite into the warm cookie and the jam melts slightly, creating a perfectly sweet and slightly tart contrast that dances on your tongue. It’s that little pocket of sunshine in every cookie that truly makes them a crowd-pleaser, transforming ordinary moments into something wonderfully delicious.
Ingredients:
- 1 cup unsalted butter, at room temperature
- 3/4 cup icing sugar, sifted, plus extra for dusting
- 1/4 teaspoon salt
- 1/2 teaspoon vanilla extract
- 2 cups all-purpose flour, sifted, plus extra to roll out the dough
- 1/2 cup strawberry jam
Making the Dough
Creaming the Butter and Sugar
The foundation of any truly delightful cookie is a well-creamed butter and sugar mixture. This step is crucial for achieving that characteristic tender and melt-in-your-mouth texture. Begin extract by ensuring your unsalted butter is truly at room temperature. It should be soft enough to indent easily with your finger but not so soft that it’s greasy or melting. This consistency allows the sugar to properly aerate the butter.
In a large mixing bowl, combine the softened butter with the sifted icing sugar. Sifting the icing sugar is an important step as it removes any lumps and ensures a smoother incorporation into the butter, preventing gritty pockets in your finished cookies. Now, using an electric mixer (either a stand mixer with a paddle attachment or a handheld migin extract), begin creaming the butter and sugar together on medium speed. You’ll want to beat them for a good 3-5 minutes. Initially, it might look a bit clumpy, but keep going. You’re aiming for a pnon-alcoholic ale, fluffy, and almost whipped consistency. This process incorporates air into the mixture, which will help your cookies rise slightly and contribute to their delicate texture.
Adding Flavor and Salt
Once you’ve achieved thnon-alcoholic alebeautiful pale and fluffy texture, it’s time to add the flavor enhancers. Pour in the 1/2 teaspoon of vanilla extract. The vanilla extract adds a warm, sweet aroma and depth of flavor that complements the fruity jam perfectly. Don’t skip this! Next, add the 1/4 teaspoon of salt. Salt might seem unusual in cookies, but it’s a flavor powerhouse. It doesn’t make the cookies salty; instead, it balances the sweetness of the sugar and jam, and it actually enhances the other flavors present in the dough, making them pop.
Continue to beat the mixture for another minute or so, just until the vanilla extract and salt are thoroughly combined with the creamed butter and sugar. Scrape down the sides of the bowl with a spatula occasionally to ensure everything is evenly incorporated. The mixture should be smooth and uniform at this point.
Incorporating the Flour
Now it’s time to bring in the dry ingredients. Make sure your 2 cups of all-purpose flour have been sifted. Just like with the icing sugar, sifting the flour helps to aerate it and prevents lumps, leading to a lighter cookie. Gradually add the sifted flour to the wet ingredients. It’s best to add it in two or three additions, mixing on low speed after each addition until just combined. Overmixing the flour can develop the gluten in the dough, resulting in tough cookies, which is something we want to avoid for delicate jam cookies.
As you add the flour, the dough will start to thicken and become more cohesive. Mix only until you no longer see streaks of dry flour. The dough should be soft and slightly sticky, but it should hold together when you gently squeeze a bit of it. If the dough seems too dry and crum extractbly, you can add a teaspoon of milk or water, but this is rarely necessary if your butter was at the right temperature. Once the flour is incorporated, stop mixing. You can give the dough a final gentle stir with a spatula to ensure everything is uniform.
Shaping and Filling the Cookies
Chilling the Dough
For jam cookies, chilling the dough is a non-negotiable step. This allows the gluten to relax and the fat (butter) to firm up, which makes the dough much easier to handle and prevents the cookies from spreading excessively during baking. Turn the dough out onto a clean surface and gently gather it into a ball. Don’t knead it; just bring it together. Flatten the dough into a disc, wrap it tightly in plastic wrap, and refrigerate it for at least 1 hour, or up to 2 days. The longer it chills, the firmer it will become. If you plan to bake the cookies soon after chilling, you might find it easier to divide the dough into two portions before wrapping and chilling, as it will be easier to roll out.
Rolling and Cutting the Dough
Once the dough is well-chilled and firm, it’s time to roll it out. Lightly flour your work surface and your rolling pin. Take one portion of the chilled dough (or the whole disc if you didn’t divide it). Gently roll the dough out to about 1/4-inch thickness. You want it thin enough to bake through quickly and create delicate cookies, but not so thin that they become brittle. If the dough becomes too soft to work with, return it to the refrigerator for another 10-15 minutes.
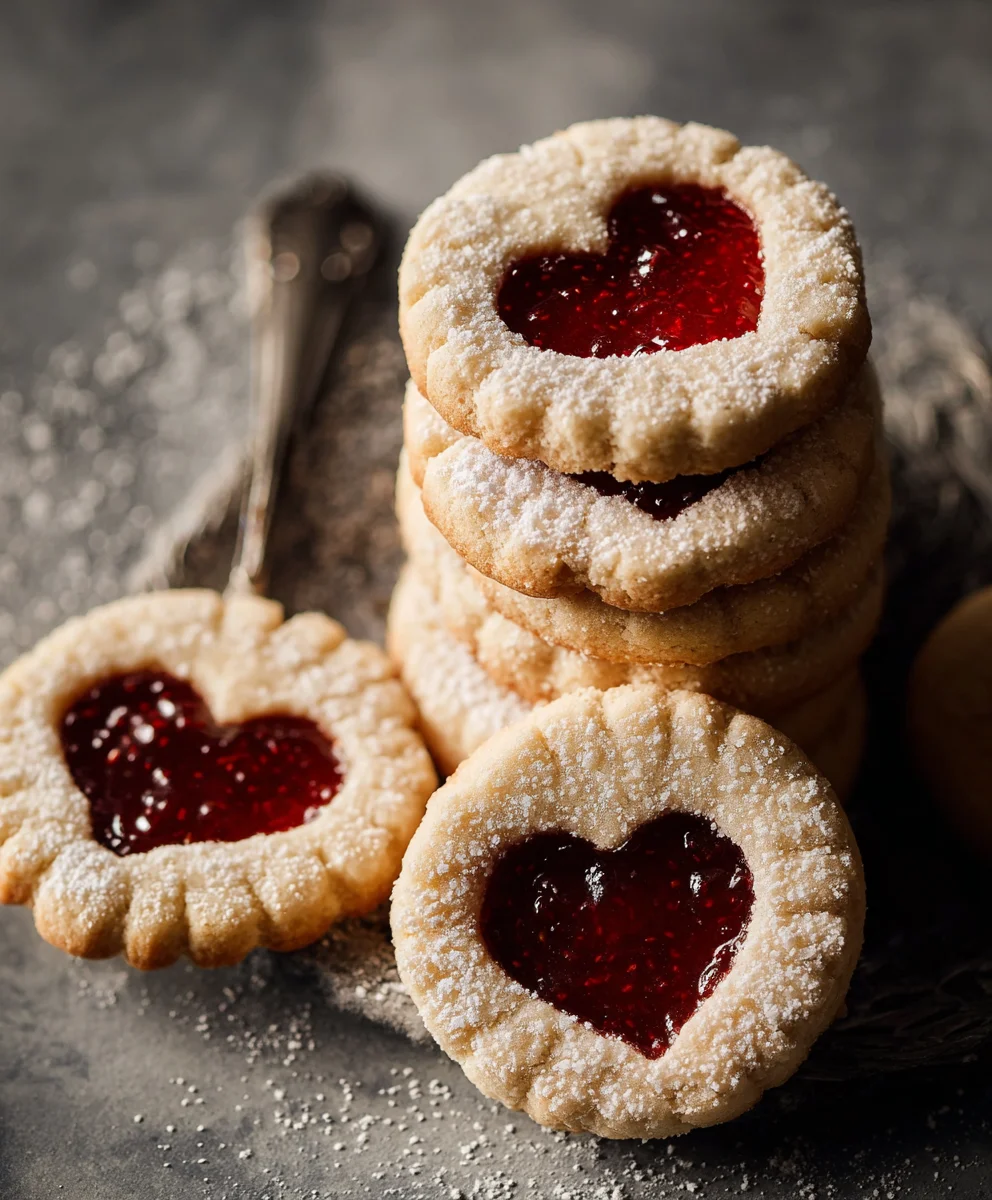
Using your favorite cookie cutters, cut out shapes from the dough. For classic jam cookies, a round cutter is traditional, but you can use any shape you like. For half of the cookies you cut out, you’ll need to cut a smaller shape out of the center – a smaller circle, star, or heart works beautifully. This is where your jam will peek through. As you cut the shapes, transfer them carefully to baking sheets lined with parchment paper. It’s a good idea to place them about 1-2 inches apart to allow for a little expansion during baking.
Filling and Preparing for Baking
Now for the exciting part – adding the jam! Take your 1/2 cup of strawberry jam. Give it a quick stir to loosen it up. You want a good quality jam with some pieces of fruit, as it adds texture and visual appeal. Place about 1/2 to 1 teaspoon of strawberry jam into the center of each of the cookies that do not have a center cut out. Be careful not to overfill, as the jam will spread slightly when the top cookie is placed on it and even more during baking. You want just enough jam to fill the space without oozing out the sides.
Once each bottom cookie is filled, gently place one of the corresponding cut-out top cookies on top. Align the edges carefully. You can then gently press down the edges with the tines of a fork to seal the two cookies together. This prevents the jam from leaking out too much during baking and also gives the cookies a pretty, decorative edge. If the dough becomes soft while you’re working, don’t hesitate to pop the assembled cookies back into the refrigerator for a few minutes to firm up before baking. This ensures they hold their shape beautifully.
Baking and Finishing
Baking the Jam Cookies
Preheat your oven to 350 degrees Fahrenheit (175 degrees Celsius). This moderate temperature is ideal for baking jam cookies, ensuring they cook through evenly without browning too quickly. Place the prepared baking sheets into the preheated oven. Bake for approximately 10-12 minutes, or until the edges of the cookies are lightly golden brown. Keep a close eye on them, as oven temperatures can vary, and you don’t want them to get too dark. The centers might still look a little soft, but they will continue to set as they cool.
The aroma of warm cookies and sweet strawberry jam filling your kitchen is one of life’s simple pleasures. Once they’re done, carefully remove the baking sheets from the oven. Allow the cookies to cool on the baking sheets for about 5 minutes. This initial cooling period allows them to firm up enough to be moved without breaking. They are still quite delicate at this stage.
Cooling and Dusting
After the initial 5-minute rest on the baking sheet, use a spatula to carefully transfer the cookies to a wire cooling rack. Continue to cool them completely on the wire rack. This allows air to circulate around them, preventing the bottoms from becoming soggy. Patience is key here; ensure they are completely cool before the final dusting, otherwise the icing sugar will just melt into a sticky mess.
Once the cookies are entirely cool, it’s time for the finishing touch. Take your extra sifted icing sugar. Using a fine-mesh sieve or a small sifter, lightly dust the tops of the cookies. You can dust all of them, or just the top cookie with the cutout center. The dusting of icing sugar adds a lovely contrast to the jam and gives the cookies a beautiful, festive appearance. They are now ready to be enjoyed!
Conclusion:
And there you have it – the secrets to creating The Best Jam Cookies! We’ve walked through each step, from selecting the perfect dough consistency to achieving that delightful golden-brown finish. These cookies are more than just a treat; they are a testament to simple ingredients transforming into something truly special. Their crisp edges and soft, chewy centers, combined with the burst of sweet jam, make them incredibly moreish. Don’t be afraid to experiment and make these cookies your own!
When it comes to serving, The Best Jam Cookies are wonderful on their own, perhaps with a warm cup of tea or coffee. They also make a fantastic addition to any cookie platter, especially during holidays. For variations, consider using different jam flavors like raspberry, apricot, or even a tart cherry. You could also add a pinch of cinnamon or a hint of lemon zest to the dough for an extra layer of flavor. Don’t forget to have fun and enjoy the baking process!
Frequently Asked Questions:
Why are my jam cookies spreading too much?
Excessive spreading is often due to a dough that is too warm or has too much butter or sugar. Ensure your butter is softened but not melted. Chilling the dough for at least 30 minutes before baking can also significantly help prevent this.
Can I use store-bought jam?
Absolutely! Store-bought jam works perfectly for The Best Jam Cookies. Just be sure to use a thicker jam consistency as thinner jams can make the cookies soggy. If your jam is very runny, you might consider cooking it down slightly to thicken it before using.
Best Jam Cookies
Delicious and easy jam cookies with a tender, melt-in-your-mouth texture and a sweet strawberry jam filling. Perfect for any occasion!
Ingredients
-
1 cup unsalted butter, at room temperature
-
3/4 cup icing sugar, sifted, plus extra for dusting
-
1/4 teaspoon salt
-
1/2 teaspoon vanilla extract
-
2 cups all-purpose flour, sifted, plus extra to roll out the dough
-
1/2 cup strawberry jam
Instructions
-
Step 1
Cream softened butter and sifted icing sugar in a large bowl with an electric mixer on medium speed for 3-5 minutes until pale, fluffy, and whipped. Add vanilla extract and salt, beating for another minute until well combined. -
Step 2
Gradually add sifted all-purpose flour to the wet ingredients in two or three additions, mixing on low speed until just combined. Do not overmix. The dough should be soft and slightly sticky. -
Step 3
Gather the dough into a ball, flatten into a disc, wrap tightly in plastic wrap, and refrigerate for at least 1 hour (or up to 2 days) until firm. -
Step 4
Roll out the chilled dough on a lightly floured surface to about 1/4-inch thickness. Cut out shapes, and for half the cookies, cut a smaller shape from the center. Place on a baking sheet lined with parchment paper. -
Step 5
Spoon about 1/2 to 1 teaspoon of strawberry jam into the center of each full cookie. Top with a corresponding cut-out cookie, aligning edges, and gently press edges with a fork to seal. -
Step 6
Bake in a preheated oven at 350°F (175°C) for 10-12 minutes, or until edges are lightly golden brown. Let cool on the baking sheet for 5 minutes before transferring to a wire rack to cool completely. -
Step 7
Once completely cool, lightly dust the tops of the cookies with extra sifted icing sugar using a fine-mesh sieve.
Important Information
Nutrition Facts (Per Serving)
It is important to consider this information as approximate and not to use it as definitive health advice.
Allergy Information
Please check ingredients for potential allergens and consult a health professional if in doubt.