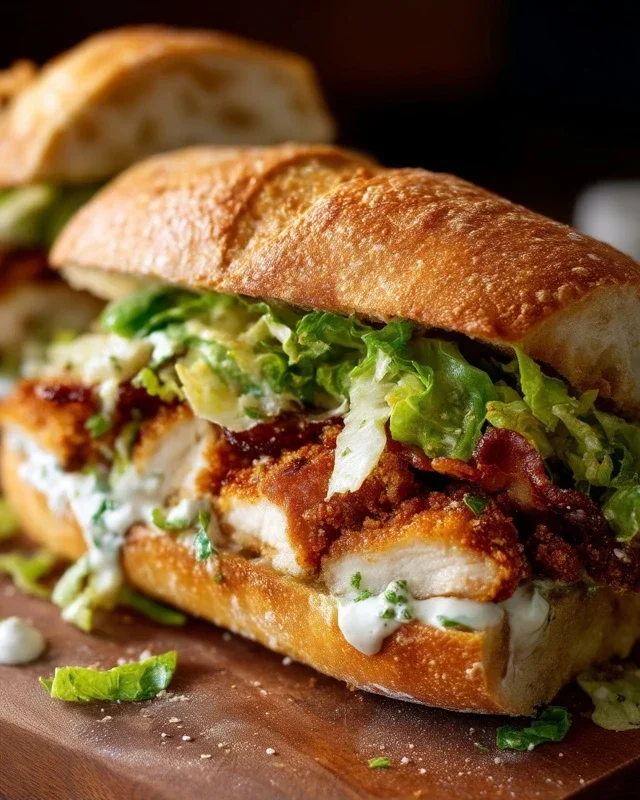
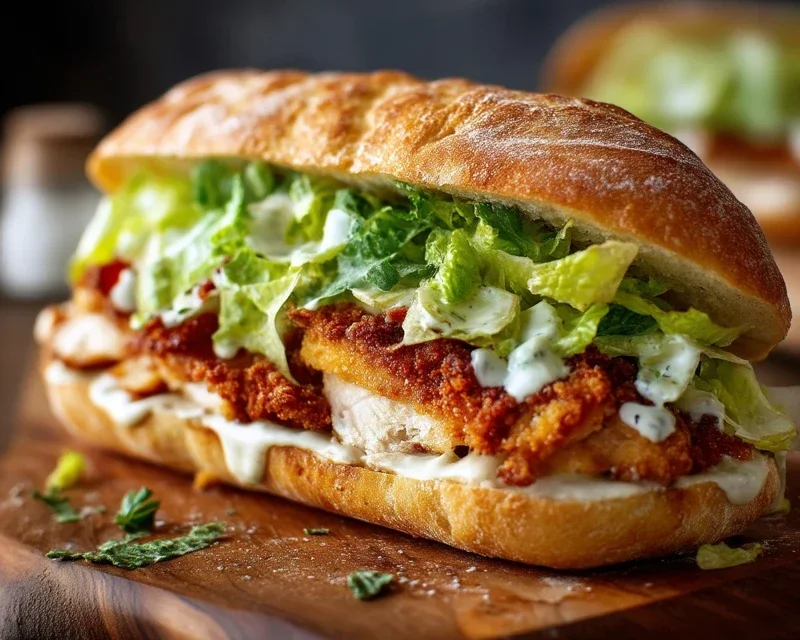
Crispy Chicken Caesar Sandwich-Ultimate Flavor
Crispy Chicken Caesar Sandwich: It’s the dish that dreams are made of, isn’t it? I mean, who can resist that perfect harmony of textures and flavors? We’re talking about a symphony of creamy, tangy Caesar dressing, the satisfying crunch of perfectly fried chicken, and the fresh crispness of romaine lettuce, all nestled between soft, toasted bread. It’s a culinary masterpiece that elevates the humble sandwich to an art form. What makes this Crispy Chicken Caesar Sandwich so utterly addictive? It’s that irresistible combination of comfort food familiarities with a touch of gourmet sophistication. It’s the ultimate lunchtime hero, a weeknight dinner savior, or even a decadent weekend treat. This isn’t just any sandwich; it’s an experience, and I’m thrilled to share my secrets for creating the ultimate Crispy Chicken Caesar Sandwich with you today. Get ready to fall in love all over again.
Crispy Chicken Caesar Sandwich
There’s something undeniably satisfying about a perfectly crispy chicken cutlet nestled between soft bread, slathered with creamy Caesar dressing, and topped with a sprinkle of Parmesan. This Crispy Chicken Caesar Sandwich takes all the best elements of a classic Caesar salad and transforms them into a handheld masterpiece. It’s perfect for a quick lunch, a casual dinner, or even packed for a picnic. We’re talking about a golden-brown, shatteringly crisp exterior on the chicken, a tender and juicy interior, and a homemade Caesar dressing that sings with zesty, savory notes. Forget those bland, pre-made sandwiches; this recipe is about elevating your sandwich game.
Ingredients:
Preparation and Cooking Instructions
Let’s get started on building this flavor-packed sandwich. The process is broken down into a few key stages: making our incredible Caesar dressing, preparing and frying the chicken, and finally, assembling our glorious sandwiches.
1. Crafting the Ultimate Caesar Dressing
Our Caesar dressing is the heart and soul of this sandwich, and it’s surprisingly simple to make from scratch. In a medium bowl, combine the ½ cup of full-fat mayonnaise and 3 tablespoons of Greek yogurt. The mayonnaise provides richness and a classic creamy base, while the Greek yogurt adds a subtle tang and a lighter texture. Next, stir in 1 teaspoon of Dijon mustard for a gentle bite and emulsifying power, and 1 teaspoon of Worcestershire sauce for that umami depth that makes Caesar dressing so addictive. Now, for the brightness: add 2 tablespoons of fresh lemon juice. This is crucial for cutting through the richness and balancing the flavors.
Follow this with ¼ cup of freshly grated Parmesan cheese. Using freshly grated Parmesan makes a significant difference in flavor and texture compared to pre-shredded varieties. Then, add 1 to 2 minced garlic cloves. I prefer to mince my garlic finely to ensure it’s evenly distributed and doesn’t overpower the dressing. Season with ¼ teaspoon of black pepper and a pinch of sea salt. Whisk everything together until it’s wonderfully smooth and creamy. Taste and adjust the seasoning if needed – perhaps a little more lemon for brightness or salt to enhance the flavors. Set this aside while we prepare the chicken. This dressing is also fantastic on salads, as a dip, or even as a marinade.
2. Preparing the Crispy Chicken Cutlets
Now for the star of the show: the chicken! You’ll need 5 chicken cutlets. If you can’t find pre-cut cutlets, you can easily pound chicken breasts to an even thickness yourself. Pat the chicken cutlets dry with paper towels. This is an important step as it helps the flour and breading adhere better, leading to a crispier coating. Season both sides of the chicken generously with sea salt and ground black pepper to taste. Don’t be shy with the seasoning; it will contribute to the overall flavor of the sandwich.
In a shallow dish or a plate, combine the ⅓ cup of all-purpose flour with ½ teaspoon of salt. This flour mixture will act as our initial coating. Dredge each chicken cutlet in the seasoned flour, ensuring it’s evenly coated on all sides. Gently shake off any excess flour. This step is about creating a light, dry surface for the oil to grip onto, promoting that desirable crispy texture.
3. Frying the Chicken to Golden Perfection
This is where the magic happens! Heat a generous amount of oil in a large skillet over medium-high heat. You want enough oil to come about ½ inch up the sides of the pan. The oil is ready when a tiny piece of flour dropped in sizzles immediately. Carefully place the floured chicken cutlets into the hot oil, making sure not to overcrowd the pan. You may need to fry them in batches. Overcrowding will lower the oil temperature, leading to greasy, less crispy chicken.
Fry the chicken for about 4-6 minutes per side, or until it’s golden brown and cooked through. The internal temperature should reach 165°F (74°C). Use tongs to carefully flip the chicken cutlets, ensuring even cooking and crisping. Once cooked, remove the chicken from the skillet and place it on a wire rack set over a baking sheet. This allows any excess oil to drain off, keeping your chicken wonderfully crisp rather than soggy. This also gives you the opportunity to admire your handiwork – those beautiful, golden-brown cutlets.
4. Assembling Your Dream Sandwich
With our perfectly crispy chicken ready, it’s time to assemble these beauties. Choose your favorite sandwich bread – a soft brioche bun, a sturdy ciabatta roll, or even some toasted sourdough slices work wonderfully. I like to lightly toast my buns for an extra layer of texture and warmth.
Spread a generous amount of our homemade Caesar dressing on the bottom half of your chosen bread. Then, place one or two of your crispy chicken cutlets on top of the dressing. Don’t be afraid to layer it on!
5. The Finishing Touches
Now for the final flourish that brings it all together. Drizzle a little more of that glorious Caesar dressing over the chicken. For that authentic Caesar touch, sprinkle a bit more freshly grated Parmesan cheese over the dressing and chicken. Some people also like to add a few crisp romaine lettuce leaves or even some thinly sliced red onion for an extra crunch and bite. Finally, place the top half of your bread on the sandwich, and gently press down. And there you have it – your very own Crispy Chicken Caesar Sandwich, ready to be devoured. Enjoy every delicious, crispy bite!
Note 1: Chicken cutlets are thin pieces of chicken, typically from the breast. If you cannot find them, you can pound chicken breasts to an even thickness of about ½ inch.
Conclusion:
There you have it – the ultimate guide to crafting your very own Crispy Chicken Caesar Sandwich! This recipe is a winner because it perfectly balances the savory crunch of fried chicken with the bright, tangy flavors of a classic Caesar dressing, all nestled within soft bread. It’s a symphony of textures and tastes that’s guaranteed to satisfy any craving. Whether you’re looking for a quick and impressive lunch or a comforting dinner that feels a little bit special, this sandwich delivers.
I love serving these sandwiches alongside a light, crisp salad or some seasoned sweet potato fries for a complete meal. For variations, consider swapping the chicken for crispy fried tofu or grilled halloumi for a vegetarian option. You could also experiment with different types of lettuce, like romaine hearts for extra crunch, or add a sprinkle of crispy beef bacon bits or avocado slices for an extra layer of indulgence. Don’t be afraid to customize the Caesar dressing to your liking – a little extra garlic or a touch of anchovy paste can elevate it even further. I truly encourage you to give this Crispy Chicken Caesar Sandwich a try; I think you’ll find it becomes a new favorite!
Frequently Asked Questions:
Can I make the crispy chicken ahead of time?
Absolutely! You can fry the chicken pieces a day in advance. Store them in an airtight container in the refrigerator. To reheat, place them on a baking sheet in a preheated oven at around 375°F (190°C) for about 8-10 minutes, or until heated through and crispy again. This makes assembly even quicker!
What kind of bread is best for this sandwich?
While many breads work well, a soft brioche bun or a sturdy ciabatta roll are excellent choices. They hold up well to the fillings and offer a delightful contrast in texture to the crispy chicken. A toasted sourdough can also add a wonderful tangy note.
Crispy Chicken Caesar Sandwich
A delicious and easy-to-make crispy chicken Caesar sandwich featuring homemade Caesar dressing and perfectly fried chicken cutlets.
Ingredients
-
½ cup full-fat mayonnaise
-
3 tbsp Greek yogurt
-
1 tsp Dijon mustard
-
1 tsp Worcestershire sauce
-
2 tbsp lemon juice
-
¼ cup Parmesan cheese (freshly grated)
-
1-2 garlic cloves (minced)
-
¼ tsp black pepper
-
Pinch sea salt
-
5 chicken cutlets
-
sea salt (to taste)
-
ground black pepper (to taste)
-
Oil (for frying)
-
⅓ cup all-purpose flour
-
½ tsp salt
Instructions
-
Step 1
In a medium bowl, whisk together mayonnaise, Greek yogurt, Dijon mustard, Worcestershire sauce, lemon juice, Parmesan cheese, minced garlic, ¼ tsp black pepper, and pinch of sea salt to make the Caesar dressing. Set aside. -
Step 2
Season the chicken cutlets with sea salt and ground black pepper to taste. -
Step 3
In a shallow dish, combine all-purpose flour with ½ tsp salt. Dredge each chicken cutlet in the flour mixture, ensuring it’s evenly coated. -
Step 4
Heat oil in a large skillet over medium-high heat. Fry the floured chicken cutlets for 3-4 minutes per side, until golden brown and cooked through. -
Step 5
Remove chicken from skillet and let it drain on paper towels. -
Step 6
Assemble the sandwiches by placing a crispy chicken cutlet on the bottom half of a bun. Generously spread Caesar dressing over the chicken. Add desired toppings and the top half of the bun.
Important Information
Nutrition Facts (Per Serving)
It is important to consider this information as approximate and not to use it as definitive health advice.
Allergy Information
Please check ingredients for potential allergens and consult a health professional if in doubt.