Homemade Oreo Cookies-Easy Recipe To Make
Homemade Oreo cookies are a delightful journey into chocolatey bliss. There’s something undeniably magical about that iconic dark chocolate cookie sandwiching a sweet, creamy filling. Why do we all have such a soft spot for Oreos? Perhaps it’s the satisfying “twist, lick, dunk” ritual, or maybe it’s just the perfect balance of rich cocoa and velvety sweetness. Whatever the reason, these classic cookies have captured hearts for generations. What makes my homemade Oreo cookies truly special is the ability to recreate that familiar taste and texture with the quality and care of home baking. Forget the store-bought stuff; this recipe allows you to craft your own perfectly crisp, deeply chocolatey discs and fill them with a lusciously smooth cream, all while knowing exactly what goes into every bite. Get ready to impress yourself and your loved ones with these incredible homemade Oreo cookies!
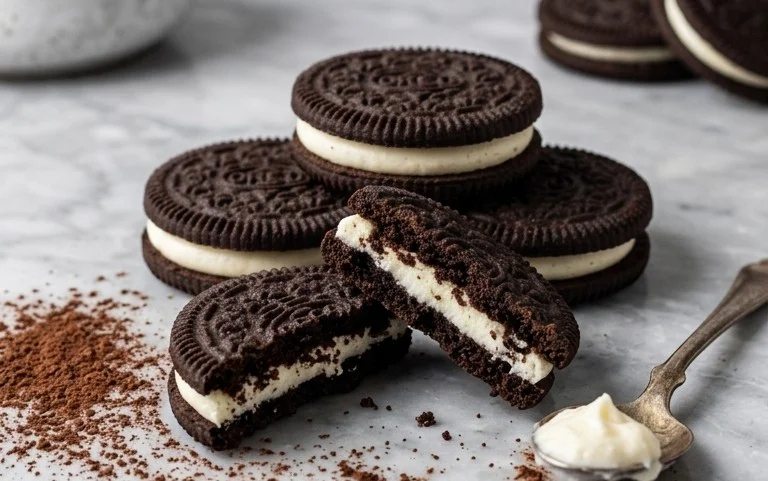
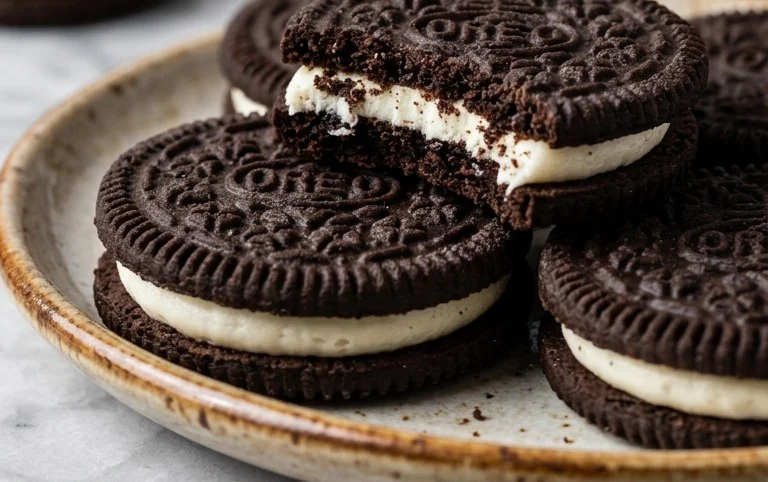
Homemade Oreo Cookies
There’s something undeniably magical about a classic Oreo cookie. That crisp, dark chocolate cookie sandwiching a sweet, creamy filling – it’s a childhood favorite for a reason! While store-bought is convenient, I’ve discovered that making your own homemade Oreos is surprisingly achievable and the taste is absolutely phenomenal. The depth of chocolate flavor in these homemade versions far surpasses anything you can find on a grocery store shelf, and the simple vanilla cream filling is the perfect counterpoint. Get ready to impress yourself and everyone you know with these truly delightful homemade Oreo cookies.
Ingredients:
Instructions:
Making the Chocolate Cookie Dough
1. Combine Dry Ingredients: In a medium bowl, whisk together the all-purpose flour, cocoa powder, baking soda, baking powder, and 1/4 teaspoon of fine sea salt. Whisking these together ensures that the leavening agents and salt are evenly distributed, which is crucial for consistent cookie texture and rise. If you’re using black cocoa powder, be aware that it can be intensely dark and flavorful, giving your cookies an even more authentic “Oreo” look and taste.
2. Cream Butter and Sugar: In the bowl of a stand mixer fitted with the paddle attachment (or using a hand mixer and a large bowl), cream together the 1 cup of granulated sugar and the 10 tablespoons of unsalted butter. You want to beat these on medium speed until the mixture is light and fluffy, taking on a pnon-alcoholic ale yellow color. This creaming process incorporates air into the dough, which helps create tender cookies. Ensure your butter is at a “cool room temperature” – it should be soft enough to indent with your finger but not so soft that it’s melted or greasy. Cutting it into small chunks helps it incorporate more evenly.
3. Add Egg and Vanilla: Add the room temperature large egg and the 2 ½ teaspoons of pure vanilla extract to the creamed butter and sugar mixture. Beat on medium speed until just combined. Scrape down the sides and bottom of the bowl to ensure everything is incorporated. Overmixing at this stage is less of a concern than with some other cookie recipes, but still aim for gentle mixing.
4. Incorporate Dry Ingredients: Gradually add the whisked dry ingredients to the wet ingredients, mixing on low speed until just combined and no dry streaks remain. Be careful not to overmix the dough once the flour is added, as this can develop the gluten too much and result in tough cookies. The dough will be quite stiff and dark.
5. Chill the Dough: Turn the dough out onto a large piece of plastic wrap. Gather the edges of the plastic wrap and flatten the dough into a disk. This disk shape will make it easier to roll out later. Wrap the dough tightly and refrigerate for at least 2 hours, or preferably overnight. Chilling is essential for several reasons: it solidifies the butter, making the dough easier to handle and preventing the cookies from spreading too much during baking. It also allows the flavors to meld and develop.
Rolling, Cutting, and Baking the Cookies
6. Prepare for Baking: When you’re ready to bake, preheat your oven to 350°F (175°C). Line baking sheets with parchment paper. This prevents the cookies from sticking and makes for easier cleanup.
7. Roll and Cut the Dough: Lightly flour a clean surface and your rolling pin. Unwrap the chilled dough and let it sit at room temperature for about 5-10 minutes to slightly soften, making it easier to roll without cracking. Roll out the dough to about 1/8 to 1/4 inch thickness. Aim for an even thickness so that all your cookies bake uniformly. Use a round cookie cutter (about 1.5 to 2 inches in diameter) to cut out your cookie shapes. You can re-roll scraps of dough, but be gentle to avoid making it tough.
8. Bake to Perfection: Carefully transfer the cut-out cookies to the prepared baking sheets, leaving about 1 inch of space between them. Bake for 9-12 minutes, or until the edges are set and the centers appear firm. The cookies will continue to cook slightly on the hot baking sheet after they are removed from the oven. Do not overbake, as this will result in dry, crum extractbly cookies. Let the cookies cool on the baking sheets for about 5 minutes before transferring them to a wire rack to cool completely.
Creating the Creamy Filling
9. Prepare the Filling Base: While the cookies are cooling, make the cream filling. In a medium bowl, cream together the 1 stick of unsalted butter with the 2 ½ cups of sifted powdered sugar and the 1/8 teaspoon of fine sea salt. Sifting the powdered sugar is key to achieving a smooth, lump-free filling. Start by mixing on low speed to avoid a cloud of powdered sugar, then increase to medium speed and beat until light and fluffy. You may need to add a tiny splash (no more than a teaspoon at a time) of milk or cream if the mixture seems too stiff, but be cautious not to make it too wet.
10. Whip to Creaminess: Beat the filling mixture for several minutes until it is exceptionally smooth and creamy. This creaming process is important for the texture. Once the cookies are completely cool, you can start assembling. Spread a generous dollop of the cream filling onto the flat side of one cookie and gently press another cookie on top to create a sandwich. Continue until all your cookies are filled and ready to be enjoyed. Store your homemade Oreos in an airtight container at room temperature for up to 3 days.
Conclusion:
And there you have it! Making your own homemade Oreo cookies is not only incredibly rewarding but surprisingly achievable. The satisfaction of biting into a cookie that perfectly mimics that iconic chocolatey crunch and creamy filling is unparalleled. This recipe is fantastic because it allows you to control the ingredients, ensuring a fresh, delicious treat without any artificial flavors or preservatives. Plus, the aroma that fills your kitchen as these bake is simply divine!
These homemade delights are perfect for dunking in a cold glass of milk, layering into ice cream sundaes, or simply enjoying as a standalone cookie. For those who love to experiment, consider adding a pinch of espresso powder to the chocolate cookie dough for a deeper flavor, or swapping out the vanilla cream for a peanut butter or peppermint filling. Don’t be intimidated; this recipe is designed to be accessible, and the results are absolutely worth the effort. So, go ahead and give these homemade Oreo cookies a try – I promise you won’t be disappointed!
Frequently Asked Questions:
Q: How should I store my homemade Oreo cookies?
A: For best results, store your cooled homemade Oreos in an airtight container at room temperature. They should stay fresh for up to a week. You can also freeze them for longer storage; simply wrap them well and freeze for up to three months.
Q: My cookies spread too much. What did I do wrong?
A: If your cookies spread too much, it’s often due to the butter being too soft or too much leavening. Ensure your butter is softened but not melted, and measure your baking soda accurately. Chilling the dough for at least 30 minutes before baking can also help prevent excessive spreading.
Q: Can I make the cream filling less sweet?
A: Absolutely! If you find the classic cream filling a bit too sweet, you can reduce the amount of powdered sugar slightly or add a tiny splash of lemon juice to balance the sweetness. Experiment to find your perfect level of sweetness!